CLASSY DECORIST
25 Dollar Tree Easter Decor DIY Ideas 2024

Do you want to prepare your home for Easter without spending too much money? Then take a look at our selection of 25 Dollar Tree Easter Decor DIYs. You can use cost-effective materials from the Dollar Tree and follow simple steps to make impressive decorative items that will wow your visitors and put a happy mood in your premises.
There are choices for all tastes and pockets, including lovely Easter wreaths to colorful table centerpieces. By applying creativity, one can turn cheap things from the Dollar Tree into nice holiday decorations for family and friends. Start making art now and make this season of Easter one that will last forever!
Related: https://classydecorist.com/easter-home-decor/

1. Six Easter Egg Dyeing Ideas
Spring is here and Easter is coming round the corner! What does this mean? It means that it’s time for family get-togethers, delicious food, and of course, decorating Easter eggs with different shades of colors.
This year, forget about those kits you buy from shops and prepare to bring out the artist in you! Here are six fun ideas for coloring Easter eggs creatively. It will suit all skill levels and ages. Most of them use materials from Dollar Tree.
Dollar tree dyeing techniques why you’ll love them:
Spendthrift: These ideas mostly use Dollar Tree supplies; thus allowing you to make stunning Easter eggs on the cheap.
Natural Beauties: Want to go eco-friendly? Explore the magic of natural dyes for a unique twist on Easter egg coloring.
Creative Freedom: Let your imagination run wild! With these methods, there is no limit as regards what can be done in order to come up with distinctive Easters eggs.
From Dollar Tree, here’s what you need (you may already have some of these things at home!) :
- White vinegar
- Vegetable oil
- Food color (liquid or gel)
- Bowls or cups (enough for each color you want to use)
- Tongs or spoons
- Optional extras depend on the technique picked (see below)
Let’s begin dyeing.
* Vinegar Dyeing Classic: The women in my family have been using this method for years. Simply combine a few drops of food coloring with white vinegar in separate bowls. Next, dip your hard-cooked eggs into the vinegar mixture and let them stay there for several minutes. The longer they sit, the more vibrant their colors become.
* Oily Swirls: Are you looking to create marbled effects that mesmerize? Then try one of these techniques! Mix some food colorings in different bowls containing vegetable oil. First, dip your cooked egg into pure vinegar and then carefully move it around in the oil mixture.
* Nature’s Dyes: Did you know that everyday items can be used for dyeing Easter eggs? Red onion peel will produce a deep burgundy color while beet juice will make them bright pink! Boil chosen organic dyes with water and soak your hard-boiled eggs inside it after it has cooled.
* Speckled Surprise: Make speckled Easter egg patterns using rubber bands. Get creative by wrapping them differently around our boiled eggs. Then put out on your choice of dye; allow it to stand dry when finished elastic pieces are removed to show off your speckles design.
* Rice Krispies Crunch: Using this trick, you can add a nice texture to your Easter eggs. Dip your hard-boiled eggs into white vinegar and roll them in crushed rice krispies cereal before dipping them into the dye solution of your choice for a speckled crunch.
* Washi Tape Magic: Are you into geometric patterns or fun designs? You should consider washi tape. Stick washi tape on your hard-boiled egg with the pattern that pleases you. After dipping the eggs in the desired dye, carefully remove washi tape to showcase the design.
Bonus Tip: Do not be afraid to experiment! Combine these techniques, use other fun finds from dollar tree, or add details with markers or paint once your dyed eggs are dry.
With these creative Easter egg dyeing ideas which won’t cost much and a trip to Dollar Tree for supplies, you can make an amazing, vibrant, and personalized set of Easter eggs that will really stand out at your Easter celebration.
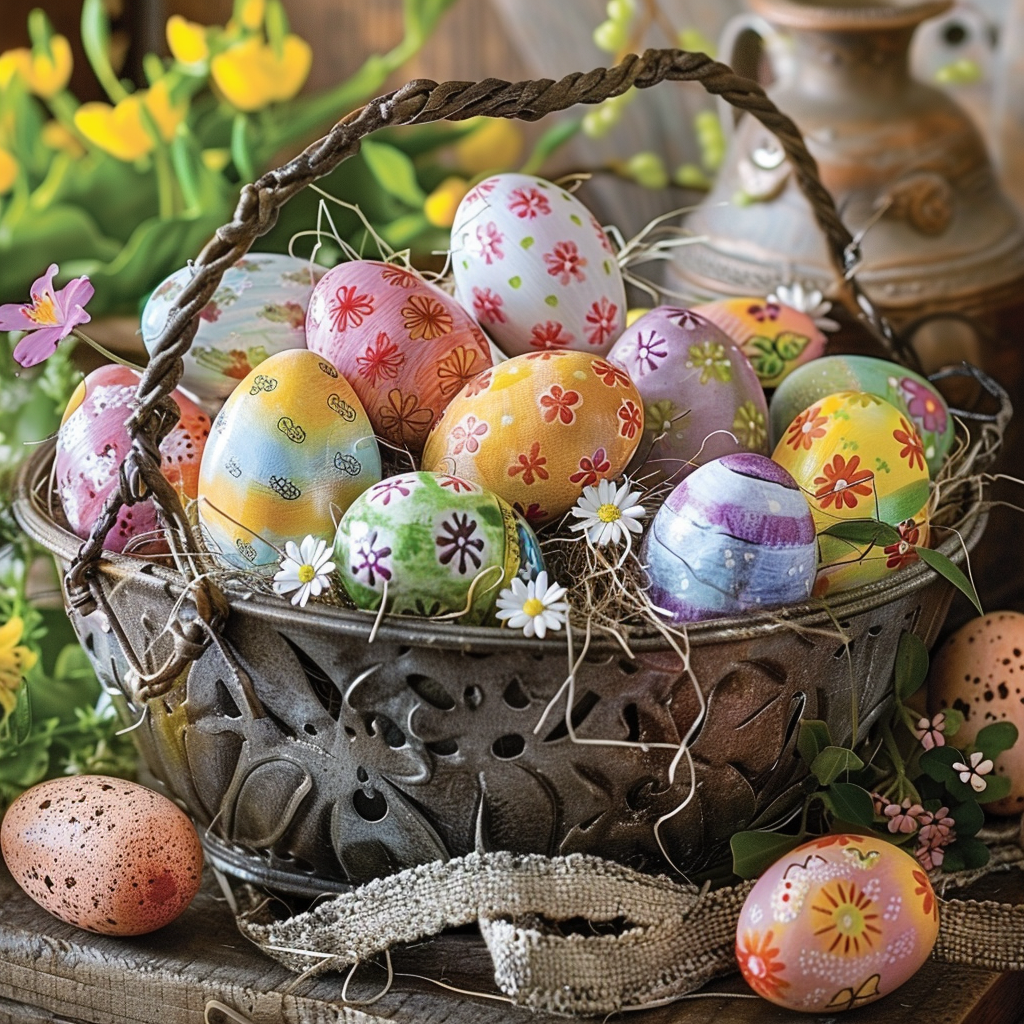
2. Egg-cellent & Easy Rustic Easter Basket
The spring has come and Easter is just around the corner!
No more ready-made baskets; make your own one without spending a fortune. This is a do-it-yourself project for those who cherish the rustic feel. You can design an outstanding Easter basket using your imagination and visiting Dollar Tree that will be both charming and functional. It will hold all your stuff perfectly!
Why you’ll love this Dollar Tree craft:
Dollar Store Delight: The majority of supplies for this project can be found at Dollar Tree, making it possible to create a stunningly beautiful basket without having to pay so much money.
Rustic Charm: Make an Easter basket that feels warm and welcoming, with some touches of rustic chic style which would match your spring décor.
Easy to Personalize: Allow yourself some creative freedom! With these cool products from Dollar Tree, you can customize your basket according to your personal tastes or those of the people you are giving it to.
Here is what you need from the dollar tree (some of these things may already be in our house!):
- Basket (wicker, wire or wooden ones work well)
- Burlap, linen or cotton in fabric scraps of springy or neutral colors would be best.
- Ribbon and/or baling twine
- Shears
- Optional add-ons to make it personal: bits of dried flowers, buttons and lace, Easter chicks for example.
We will build a rustic basket!
Lining the Basket (optional): If you want a more finished look, take another piece of fabric and cut it to fit inside the basket with extra fabric around the edges. This can be attached onto the rim by hot glue which is not necessarily available at Dollar Tree but a popular craft item.
Creating a Fabric Cuff: Now find another piece of fabric and cut out a long strip that will wrap comfortably around the outside of your basket; make sure it is longer enough to tuck under the bottom rim so as to have a good looking fabric cuff.
Securing the Cuff: Wrap the cuff around your basket while tucking its raw edge into its inside bottom; this can be secured with some hot glue or simply tied using twine or ribbon for more rustic appeal.
Adding Finishing Touches: Ready for this? Bow up that beautiful ribbon right on top of your clothed cuff — use either ribbon or twine. Want some more? Put some lace about the top rim, sew on buttons, or any other Easter-themed trimmings like stick-on decorations.
And voila! Your sweet little rustic Easter basket is done and ready for filling up with colored eggs, treats galore or even small presents among others.
This craft, spring’s harbinger, is an enjoyable means of celebrating Easter and allowing one’s creativity to run wild. Therefore get your things together, find your people and let us create for ourselves a lovely pastel wreath for Easter which will be the centerpiece of our Easter decorations!
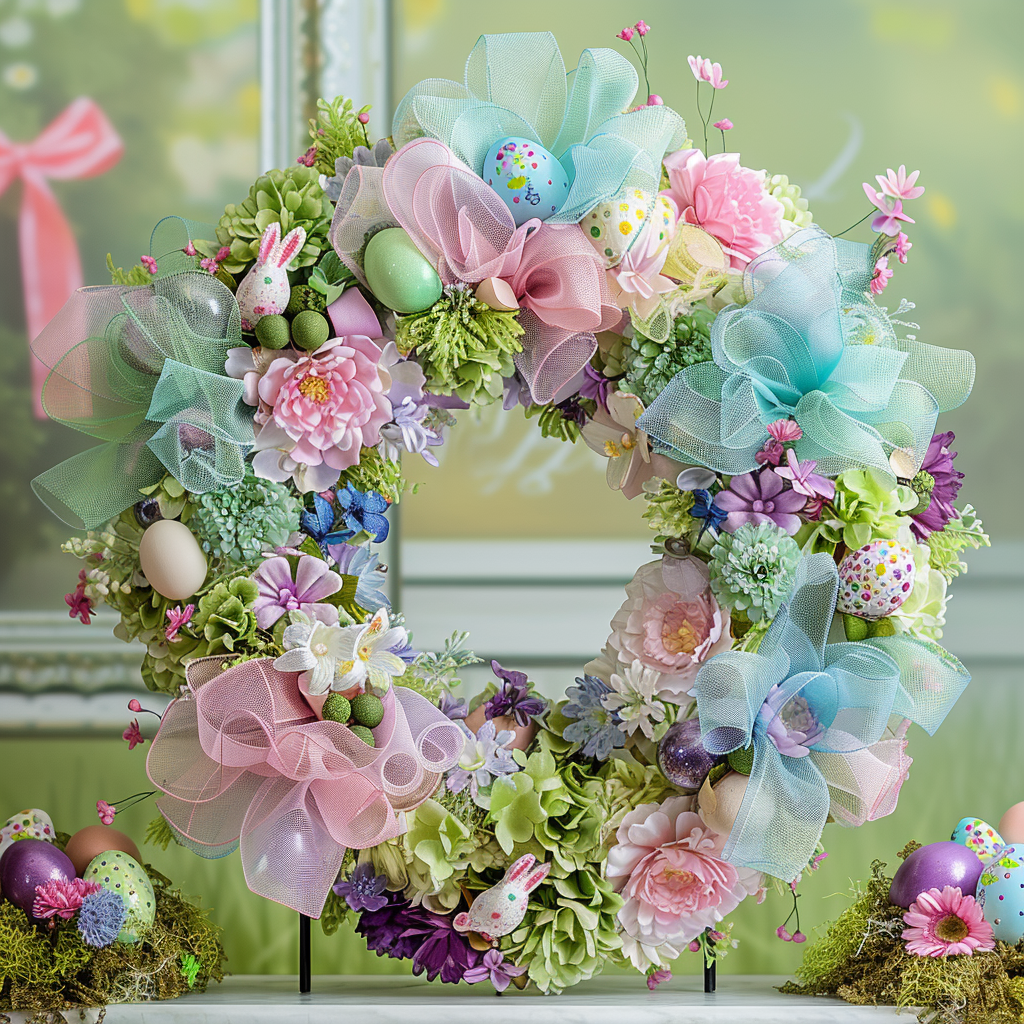
3. EGG-cellent Pastel Easter Wreath
Spring has come and Easter is just around the corner!
Now it’s time to add some color to your place and greet the season with a festive touch. What can be better than an adorable Pastel Easter wreath! Besides, it is a wonderful craft for people of all ages.
It is also a cool thing to do with friends or family, let’s create together!
To get started, here are the supplies you will need (you may already have some of these items on hand!):
- Grapevine, foam or straw wreath forms
- Plastic or foam eggs in pastel shades
- Floral wire or pipe cleaners
- Hot glue gun (optional)
- Ribbon or twine for hanging
- Optional extras that will personalize your wreath: artificial flowers, Easter chicks, moss, butterfly cutouts – anything that inspires you!
Let’s make Easter masterpiece!
Ways to Attach the Eggs: You can attach the eggs to your wreath in two ways. For example, if you use a grapevine wreath you gently push floral wire or pipe cleaner through each egg until its center then wrap ends securely around form of the wreath; otherwise use hot glue gun for any type of wreath form.
Colorful Creativity: How would you like them to decorate your pastel eggs? This can be achieved by arranging them randomly as possible, clustering in one spot or creating a design.
Embellish and Enhance: The next step is the most enjoyable part of making it look beautiful. Secure flowers on it using hot glue gun or put few Easter chicks behind the eggs. You can make a hanger out of colorful ribbons or twine so that there are more layers of texture.
Pro Tip: Are you feeling inspired by Mother Nature? Check out your garden for brightly colored mosses and twigs to add an organic feel to your wreath this Easter season.
Voila! A stunning pastel Easter wreath is now finished, ready to brighten up any door or blend with other holiday décor. Glorify it and let others appreciate!
It is a lovely springtime craft that welcomes the coming of Easter and allows you to bring forth your inner artiste. Just gather your things, call everyone close and get set for making an outstanding pastel Easter wreath –the best decoration during the Easter holidays!
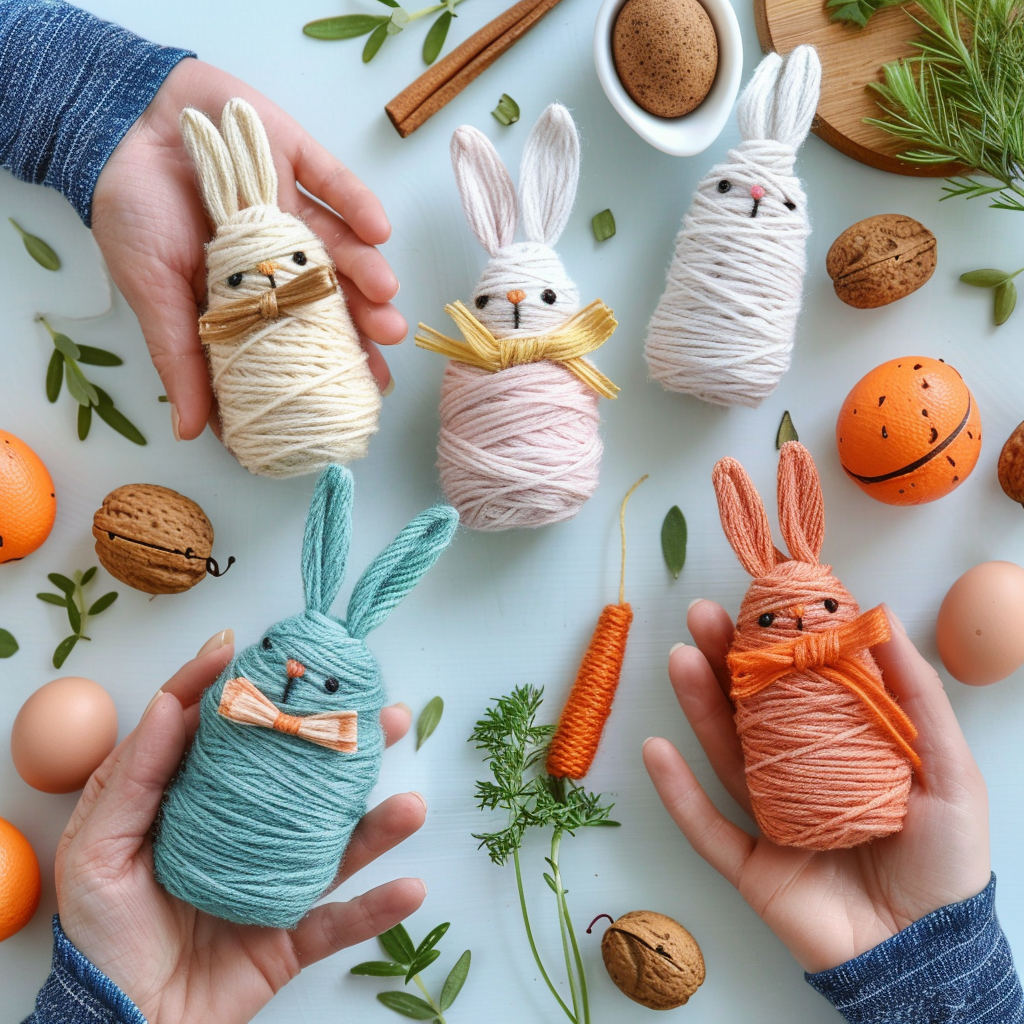
4. Yarn-Wrapped Easter Bunnies
Easter is just around the bend! Do you need some cute and comfy inexpensive bunny Easter decorations? This DIY project is right up your alley!
It is also a cost-effective way to have fun with that rustic look. These little yarn-wrapped bunnies made from simple Dollar Tree items will add a bit of whimsy to any Easter décor.
Here are some reasons why you’ll love this craft.
Perfect fit for Dollar Tree Shoppers: All You Need for this Project Are From Dollar Tree So it’s A Super Affordable Craft Anyone can do.
Easy Peasy: This Craft Is A Perfect Fit For Crafters Of All Ages; Its Steps Are Simple To Follow Even If You Have Just Started Out In Crafting
Make Them Your Own: Let Your Creativity Run Wild! There are various colors of yarn as well as fun embellishments available at Dollar
This what you need to get started (you may have some of it at home already!):
- Ceramic Easter egg decorations (Dollar Tree has various sizes and types)
- Crafter’s Square® Yarn (Dollar Tree carries many colors and textures)
- White pom-pom bunny tails (Dollar Tree has these as well.)
- Foam board
- Scissors.
- Hot glue gun and hot glue sticks.
Let’s Make Some Bunnies!
Bunny Ear Bonanza: Time to be inventive! Use the foam board to draw out and trim bunny ears. Try out different forms and dimensions for an individual look on your bunnies.
Attach the Ears: Now join the top of a ceramic egg using a hot glue gun with the foam bunny ears.
Wrapping Time! Take your favorite color of yarn, begin wrapping around the “body” of your bunny rabbit starting from the base of its ears. Be sure to tack down the yarn using your hot glue so that it does not become loose along the way.
Pom-Pom Perfection: After completely wrapping your bunny, attach a soft white pompom tail to its base for added cuteness.
The charming Easter bunnies made from yarn are now complete and will definitely brighten up the ambiance of your Easter.
Bonus Tip: Don’t be afraid to experiment with colors!
These dollar tree easter decor adorable yarn-wrapped Easter bunnies make an entire family of different colored and textured ones. You could also add some googly eyes, buttons and ribbons for more cuteness personalized just as you would love them.
Get ready to transform your Dollar Tree goodies into a basketful of smile inducing Easter decors; creative skills needed.
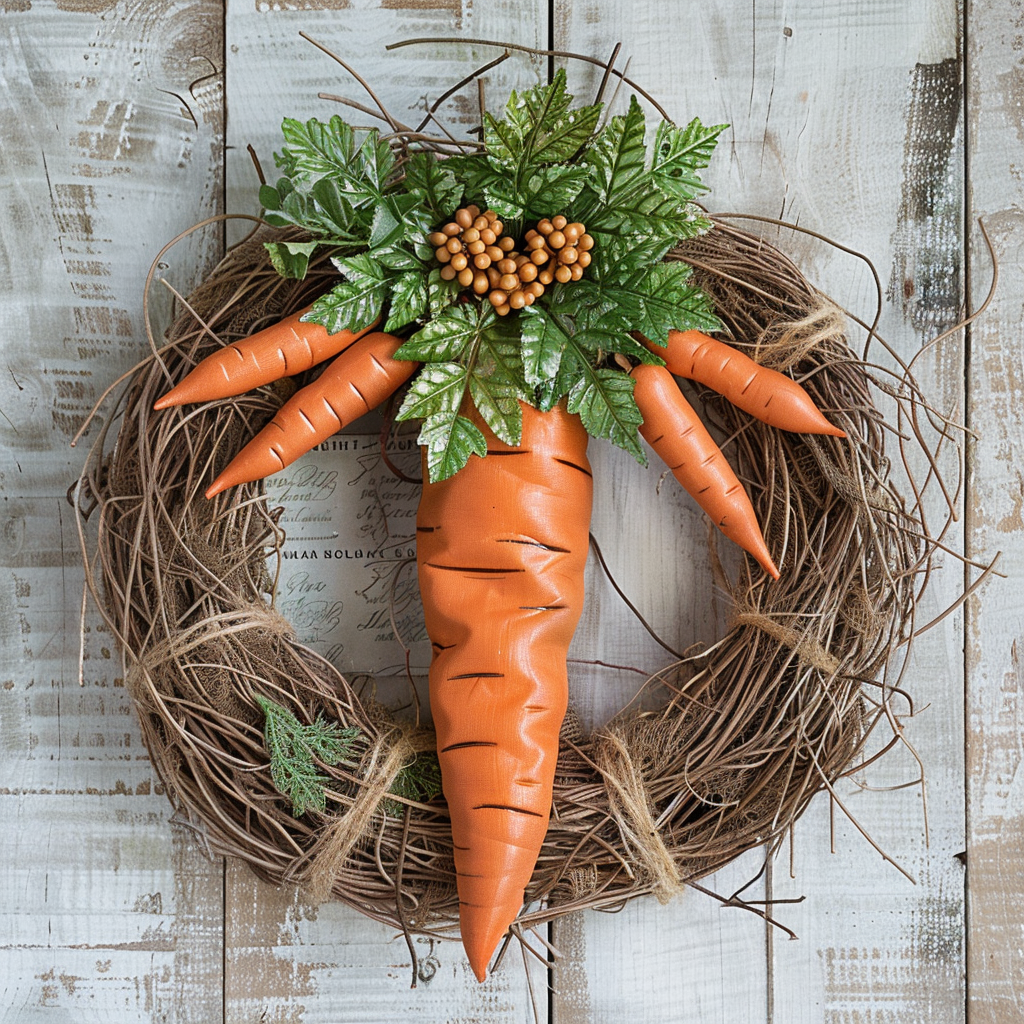
5. Rustic Carrot Wreath
Spring is over here and Easter is just lurking around the curve!
Forget about those bought ornaments; create a fun Easter wreath that is filled with rustic touch.
The best part of this craft from Dollar Tree
It’s all about the big savings: You will only spend some money on the dollar tree supplies which means you can have a classy looking Easter decoration without going bankrupt.
Old-fashioned look: Come up with an Easter wreath this spring that perfectly matches your other decorations in a warm fashion.
Easy to Customize: Get creative! With many interesting things from Dollar Tree, personalize your own wreath so it suits you well.
Here’s what you’ll need to get started (you might already have some of this stuff at home!):
- Styrofoam wreath form (any size you like works)
- Burlap ribbon in a natural tone (enough to wrap the wreath)
- Orange craft paint
- Paint brush
- Raffia or yarn in green or brown
- Scissors
- Hot glue gun and glue sticks (optional, but recommended for a sturdier wreath)
- Optional extras to make it your own: dried flowers, Easter chicks, small wooden carrots – anything that speaks to you!
Let’s make your old-fashioned carrot wreath!
Covering the Base: Firstly, we will give our foam wreath a rustic orange coat. You will have to use orange craft paint to cover all of the wreath form, which should be done for getting into all of the crevices as well. Let it dry thoroughly.
Burlap Wrap: Cut burlap ribbon into strips while you wait for the wreath to dry. Start at the outside and work inward by wrapping this around the wreath. Overlap slightly for a full, textured look as you go along with your burlap. Use hot glue (or any other method) on the back of your wreath form to secure its end.
Shaping the Carrot Top: Get enough raffia or yarn to create a carrot top out of it. For added texture, you can braid or twist it together. Spread them out over what looks like a flowing carrot top using hot glue on top of your raffia or yarn bunch and also attach to this at toptheright position on your wreath.
Adding Finishing Touches: Time for fun part – decoration! If you wish, hot glue some dried flowers or small wooden carrots onto the front part of this piece just before tying up a small bow made from additional burlap or ribbon in order to provide an extra pop of color that will add more rustic charm.
And voila! – Your rustic carrot wreath is finally done, ready to add some spring cheer to your Easter decorations. It can hang on the front door, above your mantel, or anywhere else you need a little bit of rustic charm and some Easter spirit.
Bonus Tip: Don’t have a hot glue gun? That’s not a problem! Use craft pins to stick the burlap ribbon and raffia onto the wreath frame. It may take longer but you will still come up with an elegant country-style Easter decoration.
So grab your basket, head over to Dollar Tree for supplies and get ready for an amazing Rustic Carrot Wreath that will definitely make your Easter merry!
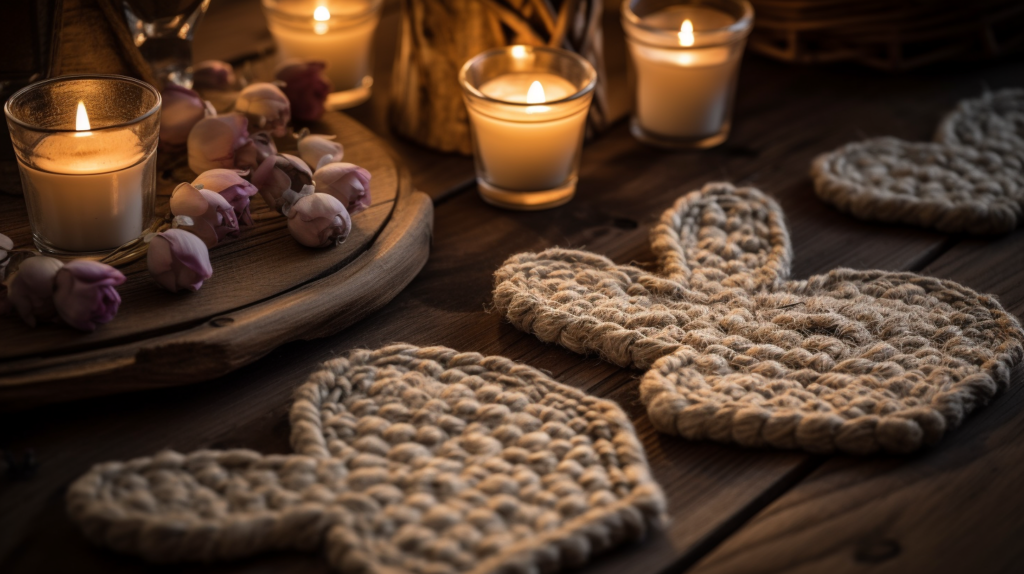
6. Rustic Bunny and heart-shaped Coasters
It’s springtime, and soon it will be Easter!
Looking for simple yet cute dollar tree Easter Decor that can also serve other purposes? This DIY is for you! You can use items easily available at the Dollar Tree store to make bunny shaped and heart-shaped coasters which look amazingly pretty.
The coasters are not only decorative but also protect furniture against spills. This project is ideal for people who want a rustic feel in their homes that looks invitingly warm.
Here’s why these rustic coasters are awesome:
Perfect for those on a budget from Dollar Tree: This craft uses everything from dollar tree making it super cheap and easy enough for anyone.
Why You’ll Love These Rustic Coasters
Perfect for Dollar Tree Shoppers: Get everything you need at the dollar shop to make these coasters; it’s a cheap DIY.
Rustic Charm: Make some cozy inviting coasters perfect for springtime decor with a touch of rusticity.
Double Duty Fun: They are not just adorable; they will protect your surfaces from drink spills and stains as well.
Here’s what you’ll need to get started (you might already have some of this stuff at home!):
- Ceramic tiles (white or natural colors)
- Acrylic craft paint in any shade of brown and white (optional: other colors for bunny accents)
- Paint brushes
- Stencils (optional: bunny or heart shapes)
- Pencil
- Scissors
- Burlap fabric scraps
- Craft glue
- Ribbon or twine
Now, let us make the rustic coasters!
How to Paint the Base(Optional): In case you want colored bases for your coasters then you can paint them with brown acrylic paints. Allow the paint to thoroughly dry.
Making Bunny or Heart Designs: There are two ways to do this:
Free hand drawing: You can use a pencil to lightly sketch bunny ears or a simple heart shape onto your painted (or unpainted) ceramic tile.
Using Stencils (Optional): If you want a more defined design, you can use bunny or heart-shaped stencils. Simply place the stencil on the tile and paint over it with white acrylic paint. Take off the stencil carefully so as to reveal your design.
Bunny Details (Optional): Thin brushes and different colors such as pink and black can be used if bunnies were made so that their eyes, nose or whiskers could be added.
Burlap Embellishments: Cut small squares or circles from your burlap fabric scraps. Use craft glue to adhere the burlap pieces to the corner of each coaster for a rustic touch.
Finishing Touches: Once your paint is dry and your burlap embellishments are secured, cut small pieces of ribbon or twine. Create a simple loop and secure it to the back of each coaster with craft glue for easy hanging.
Voila! Your charming rustic bunny and heart-shaped coasters are complete! They’re ready to add a touch of Easter cheer and functionality to your springtime table settings.
Bonus Tip: Feeling creative? Use different colored burlap scraps or add other embellishments like buttons or dried flowers to personalize your coasters even more. These would also make delightful handmade Easter gifts!
So grab your basket, head to Dollar Tree, gather your supplies, and get ready to craft a set of adorable rustic coasters that will be a perfect addition to your Easter celebrations!
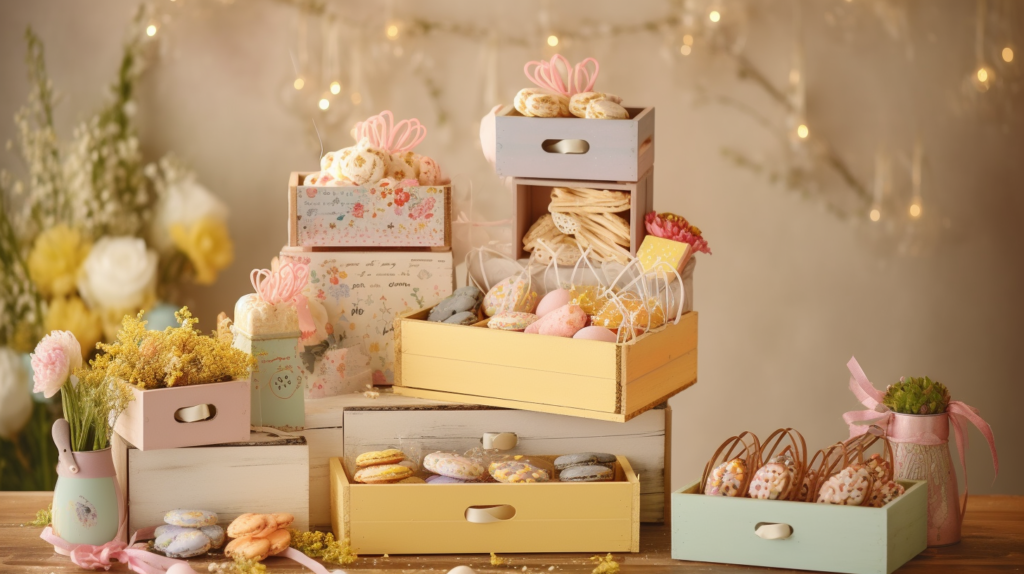
7. Bunny Bait
Spring is here and Easter is just around the corner!
Looking for some adorable Easter decorations that are easy to make and won’t break the bank?
It is the best DIY project for you!
We will create a tiered mini crate of cute ‘Bunny Bait’ using items found in Dollar Tree.
It is a perfect project to do with the kids as they will have fun making these whimsical Easter decorations.
Fill them with Easter treats or small gifts, so that they can be functional and fun at the same time.
So why would you like this Dollar Tree craft?
For Dollar Tree Shoppers: This crafting tool originated from this dollar store, which implies that it comes at a minimal cost and can be done by almost anybody.
Fun and Whimsical: Add some Easter magic to your home with a delightful Easter decoration that makes everyone smile.
Easily Personalisable: Craft on! Going through various products at dollar tree enables one to customize his or her mini crates just to match their taste.
What you need to get started (you probably already have some of it at home):
- Crafter’s Square Wood Trays with Handles (in different sizes for a tiered effect)
- Crafter’s Square Rectangular Wooden Crates with Handles (miniature size)
- Optional: Rich Art Acrylic Craft Paint in White and Pastel Colors (if you want to paint your crates)
- Crafter’s Square Brush Set
- Decorative Easter Mesh or Shredded Paper
- Floral Garden Artificial Blossom/Fern Bushes (optional)
- Floral Garden Easter Egg Picks
- Crafter’s Square Jute and Foam Carrot Décor (or other Easter-themed decorations you like)
- Optional: Farmhouse-Inspired Easter Wooden Bead Garlands with Tassels and Tags
- Hot Glue Gun and Hot Glue Sticks
- Permanent Marker (optional)
Now let’s make our Bunny Bait!
Painting the Crates (Optional): Take some acrylic paints that would match your color scheme if any, then paint the wooden crates and trays using them. Then wait for it to dry.
Creating the “Bunny Bait” Sign (Optional): To put in a fun message, use a permanent marker to write “Bunny Bait” or another cute Easter message on a small tag or piece of cardstock. If you want you can go ahead and add some glitter or even some stickers related to Easter.
Assembling the Tiered Crates: Fix the miniature crate on top of the bottom tray at an angle using hot glue to give it an attractive look. You can add more tiers by gluing other wooden trays and crates at angles.
Adding Greenery (Optional): Add decorative Easter mesh or shredded paper to the bottom tray for a splash of color and texture.
Moreover, you can use some artificial floral greenery to give it a spring feel.
Bunny Bait Essentials: But now comes the fun part – placing Easter egg picks and jute carrot décor throughout the tiers. Remember to also hang your cute “Bunny Bait” sign!
Finishing Touches: Show off your personality! Drape farmhouse bead garlands around the crates or tiers for an extra touch of charm. Other Easter-inspired embellishments you can consider adding are mini chicks, plastic carrots, and little pinwheels.
Voila! We have just completed our Bunny Bait tiered mini crates that look so cute and will bring a smile on your face as well as cheer up any room during Easter springtime. This craft will liven up any Easter party or even make another handmade gift for this season.
Bonus Tip: Add some colorful candies, tiny toys or chocolate eggs in your Bunny Bait crates for an additional holiday surprise!
This tiered display is sure to be a hit with both kids and adults. Therefore, grab your basket, go to Dollar Tree, gather up all of your supplies and let’s make some adorable Bunny
Bait tiered mini crates that would add more charm to our Easter festivities!
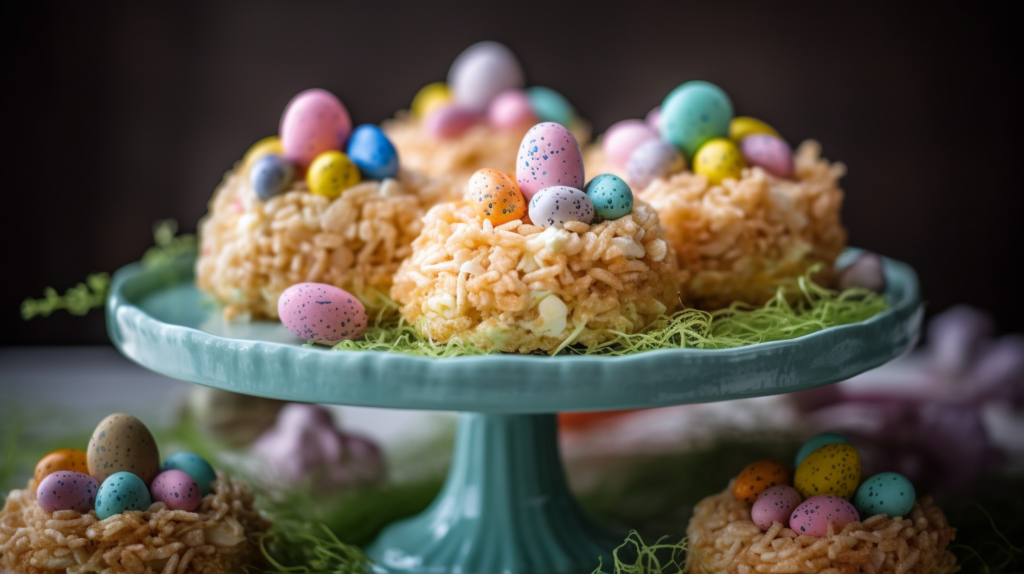
8. Rice Krispie Easter Egg Nests
Spring has sprung and Easter is hopping right around the corner!
Looking for yummy Easter treats that are easy to make and won’t cost a fortune?
These Rice Krispie Easter Egg Nests are perfect! This recipe is a fun twist on a classic Easter treat, and uses mostly things you can find at Dollar Tree.
Get the whole family involved in making these adorable nests! They’re so easy to make, perfect for bakers of all ages. Plus, they’re delicious and festive – a winning combo for any Easter celebration.
Here’s why you’ll love these Dollar Tree Easter Nests: Perfect for Dollar Tree Shoppers: Everything you need for this recipe is from Dollar Tree, so it’s a super affordable Easter treat that anyone can make.
Sweet and Easy: These Rice Krispie treats are incredibly simple to make, making them a great activity to do with the kids. Transform everyone’s favorite Rice Krispie treats into adorable Easter nests! These will add a touch of whimsy to your Easter table.
Here’s what you’ll need to get started (you might already have some of this stuff at home!):
- Marshmallows (a big bag)
- Rice Krispies cereal (a family-sized box)
- Coconut flakes (optional, for making green “grass”)
- Food coloring (green, optional)
- Zip-lock bag
- Muffin tin
- Cooking spray
- Small bowls (for melting and coloring coconut, optional)
- Mini Easter eggs (to fill the nests)
- Optional decorations: sprinkles, candy chicks, chocolate eggs
Let’s Craft Your Delicious Easter Nests!
Melting the Magic: In a large saucepan over medium heat, melt your butter or margarine. Once melted, add the marshmallows and keep stirring until they’re completely melted and smooth – like magic!
Cereal Time: Take the pan off the heat and carefully pour in your Rice Krispies cereal. Gently fold the cereal into the marshmallow mixture until everything is well coated.
Nest-Making Magic: Lightly spray your muffin tin with cooking spray. Using a spoon that’s been dipped in butter or grease, scoop out some of the Rice Krispie mixture and press it into the muffin cups. Try to form them into nest shapes. You can use the back of the spoon to make little indents for the eggs.
Let Them Set: Your Rice Krispie nests should be left to cool and harden completely at room temperature; normally this will take around thirty minutes.
Creating “Grass” (Optional): Do you want some “grass” in your nest? To do this, add a few drops of green coloring to the coconut flakes. Place the coconut flakes in a zip-lock bag with the dye and shake until all the flakes turn green.
Time to Decorate! Slowly lift out your rice krispy nests from their muffin pan. Use your green coconut flakes as grasses for these nests’ bases. Finally, put your mini Easter eggs or candy chicks inside them or any other Easter treats which you would like on top of them.
Voila! Your cute and delicious Rice Krispie Easter Egg Nests are done! This sweet and simple treat is perfect for Easter gatherings, classroom snacks, or even to add to Easter baskets.
Bonus Tip: Have fun with decorating! Personalize your Rice Krispie nests for Easter even further by adding decorative sprinkles, chocolate eggs or even edible flowers.
So grab your basket, head to Dollar Tree, gather your supplies, and get ready to bake up a batch of delightful Rice Krispie Easter Egg Nests that everyone will love this Easter season!
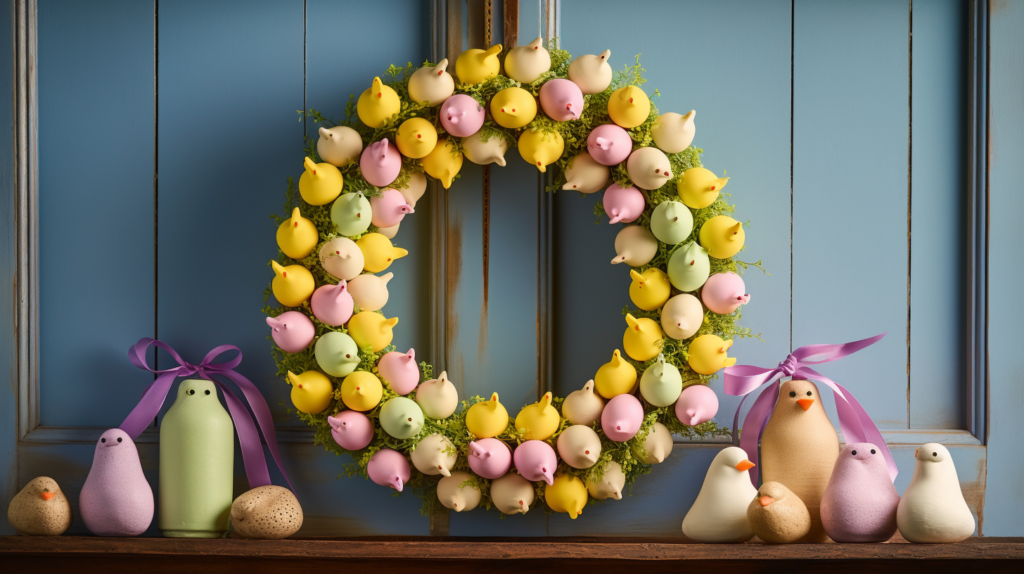
9. Peeptastic Easter Wreath
This “Peep” Easter Wreath will do wonders for your living space!
We will use Peeps – those classic Easter goodies to make an edible and festive decoration for the house.
This is a good project for all ages of crafters: it does not need any skills but only requires a trip to dollar tree; let’s try, your home will have the most joyous Easter decorations with this vibrant and multicolored wreath.
Here’s why you’ll adore this “Peep”tastic Wreath:
Great for Dollar Tree Shoppers: Everything needed for this project should be shopped from a one-dollar store. It means that anyone can afford to buy it as an Easter decoration.
Sweet and Easy: This easy-to-make wreath is perfect for those who would like to create their own handmade touch on their Easter décor.
Peep Perfection: Tell people about your fascination with traditional Easter sweets! What makes up this cute and festive wreath are Peeps.
Here’s what you need (you may already have some of these things at home):
- Styrofoam Wreath Form (any size you prefer)
- Bulk Bags of Peep Chicks (choose your favorite colors or mix them up!)
- Hot Glue Gun and Hot Glue Sticks (or craft pins if you don’t have a glue gun)
- Curling Ribbon or Yarn (in Easter colors if available!)
- Optional Embellishments: Easter Eggs, Decorative Mesh, Spring Flowers
Let’s Craft Your Peeptastic Wreath!
Securing the Peeps: use hot glue gun to attach each peep sideways on the Styrofoam wreath frame. Begin with the outer part and finally cover the entire form of the wreath. You can be creative in terms of color! One can switch between colors or try to make attractive stripes using their Peeps.
Adding Ribbon or Yarn: Cut curling ribbon or yarn once all the Peeps are completely placed onto your wreath.
With hot glues (or craft pin), make a loop for hanging on one side while attaching the other end to hide behind the wreath form. Then wrap the ribbon around this form via hot gluing it down till when there will be no spaces between Peep chicks.
Customize: Now it is time to customize the wreath as you please! Besides, you can make your wreath more beautiful by adding some Easter eggs, decorative mesh or spring flowers and others.
Voila! Your cute “Peep” Easter Wreath is finished and now it’s ready to grace your Easter decor with a little bit of sugar and springtime happiness. Hang this on your front door or above your fireplace or any other place where you would like to add a pop of Easter color and playfulness for your home.
Bonus Tip: Do not have a hot glue gun? Not an issue! You can use craft pins instead to pin down the Peeps onto the wreath form. It might take a while longer but in the end you get yourself an awesome looking colorful Easter wreath.
So grab that basket and let’s head out to Dollar Tree, gather up those supplies, because we are about to create a Peeptastic Easter Wreath that will be perfect for your upcoming Easter!
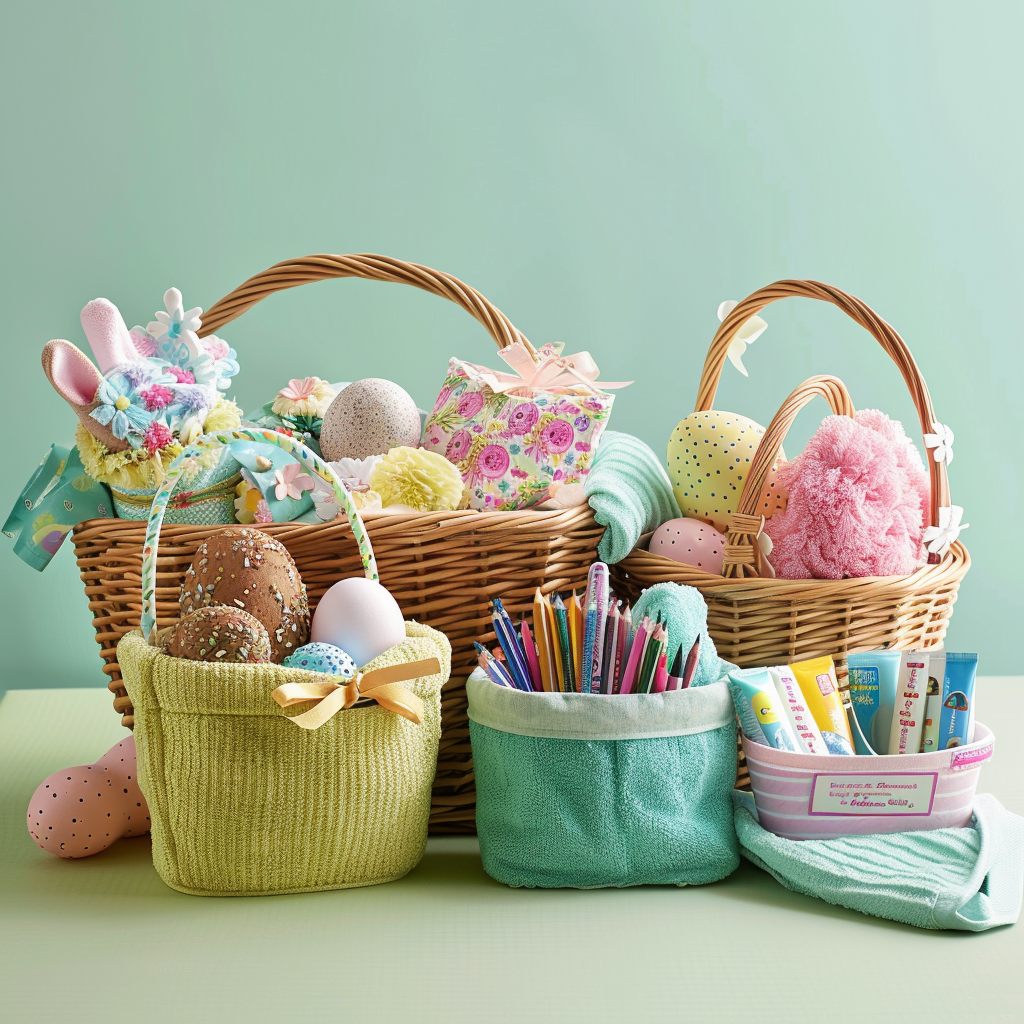
10. Dollar Tree Easter Basket Ideas
Spring is here! And there are only few days left until the most important Christian holiday. Looking for cheap but creative ideas for an Easter basket? Then Dollar Tree would be your Walmart!
The beauty of this all? There are amazing prices at Dollar Tree that allow one to make astonishing gifts within the budget without overspending.
Moreover, because there are many assortments at Dollar Tree, the basket could be made really creative in a way that it embraces the personality of the receiver.
Here’s why you will love Dollar Tree Easter Basket Ideas:
Thrifty Fun time: Fill up an Easter basket without breaking the bank! They have affordable prices at Dollar Tree.
Unlimited Creativity: At Dollar Tree, there is an array of things to select from hence you can make various Easter baskets.
Something for Everyone: From Spas stuffs for adults to candies for kids, fillers can be found for everyone on your list’s baskets come Easter.
Let us take a look at some ideas for Dollar Tree Easter Baskets!
For Kids:
* Classic Candy Basket: This one never gets old. Take a colorful basket and load it with all their favorite jellybeans, chocolate bunnies and other Easter candies. Add up some fun items found in dollar tree like slinky springs or bouncing balls or even tiny soft toys to create more excitement.
* The Artful Basket: Ignite their creativity with a basket full of art supplies! Buy crayons, construction paper, washable markers and coloring books – all available at Dollar Tree. You may add some stickers or stencils relating to Easter theme as well.
* Spa Day Basket: To create an ambience of relaxation, pick up bath fizzers, hand cream, face masks and nail polish from a Dollar Tree. Lastly, an eye mask and a fun bath towel for ultimate pampering should not be left out.
* Techie Treats Basket: Fill a basket with add-ons such as chargers, mini speakers or earphones that connect to the phone. Add in any App Store gift card or streaming service voucher to make it more interesting.
For the Adults:
* Coffee Lover’s Basket: Put together some gourmet coffee beans(try different flavors), unique creamer cups, colorful mugs and chocolates at Dollar Tree. For visual appeal throw in some colored coffee beans in tiny sachets.
* Homebody Haven Basket: Make a quiet haven that has cozy rugs with burning candles inside the bathroom including a nice novel from Dollar Tree. You can even include a small puzzle or deck of cards for variety.
* Gardening Galore Basket: Get gloves, small tools for gardening-like trowels and forks-seed packets along with a pretty flower pot all from Dollar tree . Don’t forget also to put in your basket watering can to come up with complete set.
Bonus Tip: Thy outside the box! Dollar Tree has various kinds of containers such as pails, cans, and even decorative boxes that can be used to form Easter baskets which are unique. Add tissue paper, bows or personalized tags to make your baskets even more special.
You can create wonderful yet pocket friendly Easter baskets amid little creativity and a visit to Dollar Tree this Easter season! So hold on tight to your basket and prepare yourself for filling it up with some egg-cellent Easter cheer!
Related: https://classydecorist.com/innovative-diy-easter-basket-ideas-for-men/
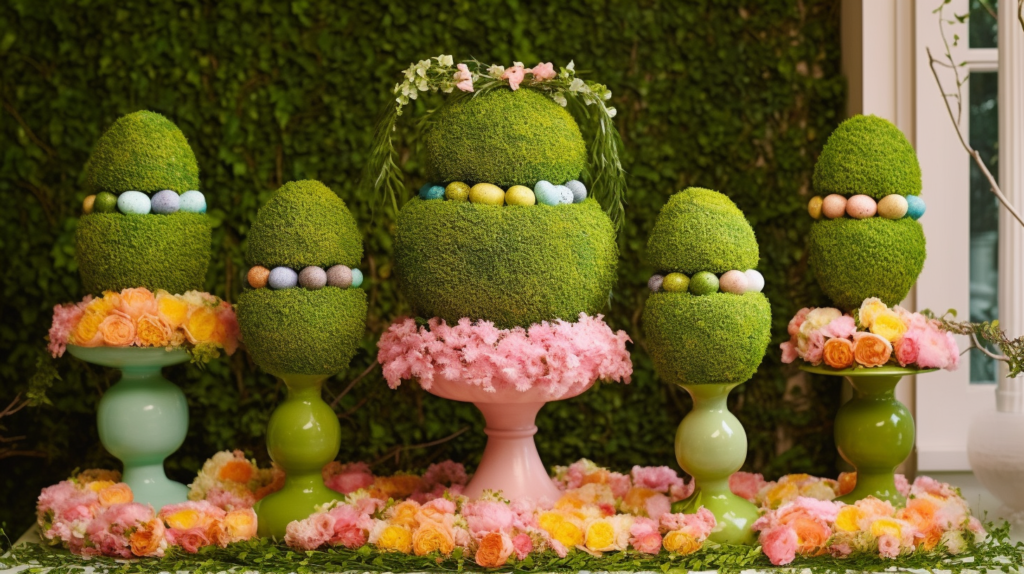
11. Easter Egg Topiaries
The spring has sprung and soon enough it will be Easter time!
Are you looking for a cheap and exciting way of decorating for the coming Eastertide?
These DIY Easter Egg Topiaries are just perfect! They’re an awesome combination of poshness and whimsy that will work beautifully into your Easter decorations, yet they’re also shockingly inexpensive since most of the materials required can be found at Dollar Tree.
These topiaries would serve as great centerpieces on your dining table during Easter. They are pretty, festive, and can be completely tailored; therefore one is able to make something that reflects their personal taste.
Here’s the reason you’ll love these Dollar Tree Topiary Treats:
For Dollar Tree Shoppers: All you need for this project can be purchased at Dollar Tree, making it an extremely cheap Easter decoration that anyone can make.
Sophisticated but Playful: These topiaries bring together elegance and the joy of having Easter eggs to form a special and festive focal point.
Simple to Customize: With the supplies from Dollar Tree, you can personalize your topiary so as to suit your style.
Here’s what you’ll need to get started (you might already have some of this stuff at home!):
- Styrofoam Cone in any size
- Decorative Easter Eggs in Bulk
- Hot Glue Gun and Hot Glue Sticks (or craft pins if you don’t own a glue gun)
- Spanish Moss (optional for a natural look at the base)
- Decorative Easter Grass (optional for colorful base)
- Ribbon or Twine (to finish it off)
- Optional Embellishments—Artificial Flowers, Small Chicks, Mossy Twigs
Let Us Make An Egg-cellent Topiary!
Preparing the Base: So, first things first. You get to choose how you want the bottom of your topiary to look!
Natural Touch: Wrap Spanish Moss around the cone using hot glue, giving it a natural textured base.
Dress Your Greenery: Put the styrofoam cone in a spiral from top to bottom with a bright and festive base of colored Easter grass, using hot glue as an adhesive.
Fixing the Eggs onto the Cone: Now it is time to attach the Easter eggs. You can begin from below working your way up to turn your pyramidal shape into a spiral pattern by sticking the eggs on using hot glue. You can also enhance your topiary by utilizing alternating colors or styles
Covering Up Spaces: To complete covering most of the cone with Easter eggs, use smaller egg-shaped ones or any other available Easter decors such as even small baby chicks or plastic flowers.
The Final Touches: Use ribbons or twine at its base to hide its bottom surface and make it look finished. You may also add some mossy twigs, etc., by hot gluing them around its base for extra whim cringing.
Voila! Now that you have completed this beautiful DIY holiday centerpiece, it’s time to find a place for it in your home. Put it on display during Easter celebrations on an entryway table or mantel – this eye-catching centerpiece will definitely steal attention!
Bonus Tip: No hot glue gun? Absolutely No Problem! You can use craft pins to secure the Easter eggs and other embellishments on the Styrofoam cone. It will take a bit longer, but you would still get a lovely Easter topiary.
So grab your basket, head to Dollar Tree, gather your supplies, and get ready to craft some top-notch topiaries!
Let your creativity flow and make an Egg-cellent unique topiary that doubles as a delightful centerpiece for your Easter celebrations.
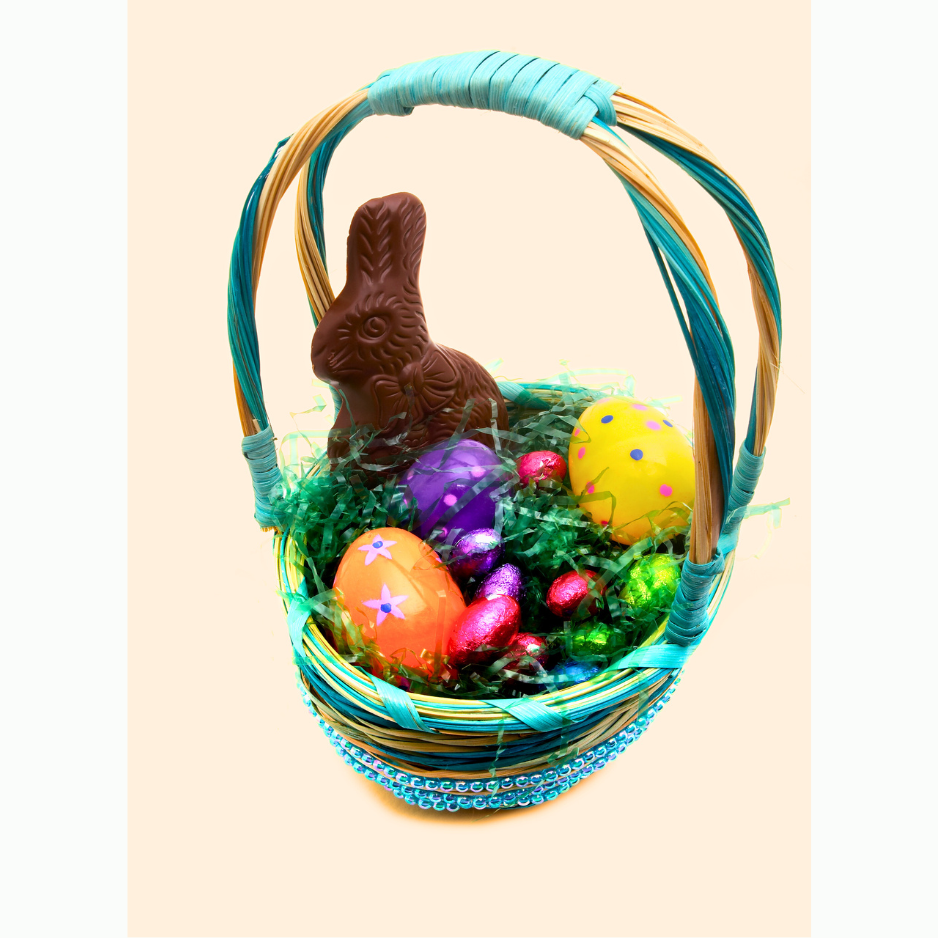
12. Easter Candy Baskets
Springtime is here and Easter is right around the corner!
Want inexpensive eco-friendly ideas for adorable Easter baskets? Look no further than DIY candy Easter baskets made with things you already have at home!
This is not only a great alternative to buying new baskets every year but also it gives an opportunity for creativity. Thus, by reusing what could be thrown away otherwise, one can make unique self-expressive Easter baskets which are nice to our planet too; moreover they can be stuffed with Dollar Tree’s delicious Easter candies!
Here’s why you’ll love these Repurposed Candy Baskets:
Eco-Friendly Fun: Don’t throw what you can use again!
For the celebration of Easter, this is a good idea to save our earth.
Budget-Friendly Fun: Save some money this Easter by using what you already have and filling the baskets with treats from Dollar Tree.
Endless Creativity: Let your imagination fly! There are no wrong answers when it comes to decorating these baskets.
Here’s What You Need To Get Started (You May Already Have Some Of This Stuff At Home!)
- Cardboard Boxes – shoeboxes, cereal boxes, etc.
- Newspaper or Magazine Cut Outs (optional for decorating)
- Fabric Scraps or Wrapping Paper (optional for covering the box)
- Paint (optional for a colorful base)
- Craft Buttons, Ribbon or Twine – to decorate your basket
- Basket Filler – shredded paper, crinkled tissue paper etc
- Dollar Tree Easter Candy – your favorite treats!
Let’s Craft Your Sustainable and Sweet Baskets!
Choosing Your Base: Find any reused box in your house!
Shoeboxes, cereal boxes, or maybe a small gift box can be remade into delightful Easter baskets.
Deck Out Your Base (Optional): Here are just a couple of ideas that can make your box look extra special. Paint it! Liven up your box with some paint in an Easter-like tone. Make sure it is dry before you proceed further.
Create a collage! Get pictures of bunnies, eggs or any other Easter related stuff from magazines or newspapers. After that, employ decoupage to glue these images on your box.
Cover it up! Use different types of fabrics and wrapping papers. You can hold the edges in place using hot glue or craft tape.
Now we decorate: Make your basket look unique! A couple of buttons for paper crafts, colorful ribbons or even twine can be joined using hot glue. Moreover, you may also spice it up by cutting out bunny ears and some other Easter ornaments.
Stuff It!: Put crinkled tissue paper or shredded paper inside your basket. This helps to make a bed where all Easter candy is easily kept.
Sweeten the Pot: Fill your basket with Dollar Tree’s best Easter candies! These could be jelly beans, chocolate bunnies or pastel colored candies among others. Hence forth; behold! The cutest and most sustainable DIY Easter baskets are ready for use! They make perfect baskets for an eco-friendly and inexpensive Easter egg hunting event together with classroom treats as well as special presents to give friends and family members during such seasons.
Get the whole family involved in this bonus tip. Everyone can have fun repurposing everyday materials while decorating the baskets, making it a nice Easter craft activity for All! Just let your imaginations be wild and make them together, creating unique and personalized baskets.
So grab a box now, gather all your repurposable materials and let’s go sustainable crafting with sweet Easter baskets! This project is an enjoyable way to celebrate Easter while being kind to the planet and your pocket.

13. Dress-Up Easter Bunny Décor
Spring is here; so, it will be Easter soon!
Looking for a fun & easy way to decorate your home for Easter? The DIY Dress-Up Easter Bunny Décor provides the best option!
This project is about making cute little bunny decorations from items you can get at Dollar Tree.
They offer whimsical personalization options to your Easter decorations which are perfect for tiered trays, mantels, shelves or anywhere you would like some springtime cheer.
Here’s why you’ll love this Dress-Up Bunny Décor:
Dollar Tree Friendly: You can find everything needed in Dollar Tree for this project. It is therefore an extremely cost-effective way of decorating during Eastertime.
Uncommon Hare: Unleash your imagination and make unique bunnies by adding different accessories!
A Multifaceted Display: Any room can accommodate these rabbits! You can position them in tiered trays, mantels, shelves or any place of your choice to add a touch of Easter.
Here’s what you’ll need to get started (some of this stuff, you might already have at home!):
- Tiny Bunny Figurines Made from Wood (Look for various sizes and styles at Dollar Tree)
- Acrylic Craft Paint in White and Pastel Colours (Only if you want to paint the bunnies)
- Paint Brushes
- Old Clothes or Felt Pieces (for bunny outfits and accessories)
- Buttons, Ribbon, or Twine (for decorating your bunnies)
- Craft Glue Stick or Hot Melt Gun with Bonding Sticks
- Additional Decorations: Moss, Mini Wreaths, Floral Picks
Let’s Create The Hoppy Chic Bunnies!
Start painting Your Bunnies: If you prefer a certain color for your rabbits you can paint them using acrylic craft paints. However ensure that the paint dries before going ahead.
Dress Up Time! This is where it gets interesting! Consider these as starter tips:
Fashionista of Springtime: Cut tiny dresses/overalls from fabric scraps with flowers glued on top for the rabbits.
Bunny That Is A Garden Gnome: Put brown felt pants on your bunny and a green felt hat.
You can also stick in their hands a small watering can or gardening tools to make them look cute as hell.
Tea Party Time: Create your bunny a nice little skirt using felt then stick a tiny teacup and saucer on its claws for a pompous tea party.
Accessorize Away! Now, put some final touches! You can use buttons instead of eyes; you could use ribbons as collars or even bows, while twine may be used for the belt. Even miniature Easter egg baskets or floral picks can make it more like spring.
Creating a Scene (Optional): Use decorative moss to create a small nest for your bunny if you want the display to have an extra Easter feel. These are options that add mini Easter wreaths or other festive decorations to them too.
Voila! Your adorable and unique dress-up Easter bunny decor is completed! These adorable bunnies would surely contribute to your Easter decoration’s playfulness and sunniness of springtime.
Bonus Tip: This is a great project to do with the whole family! Everyone can create their own unique bunny and add their own creative flair.
So grab your basket, head to Dollar Tree, gather your supplies, and get ready to craft a collection of hoppy chic Easter bunny décor!
These adorable bunnies are the perfect way to customize your Easter decorations and bring some spring into your home.
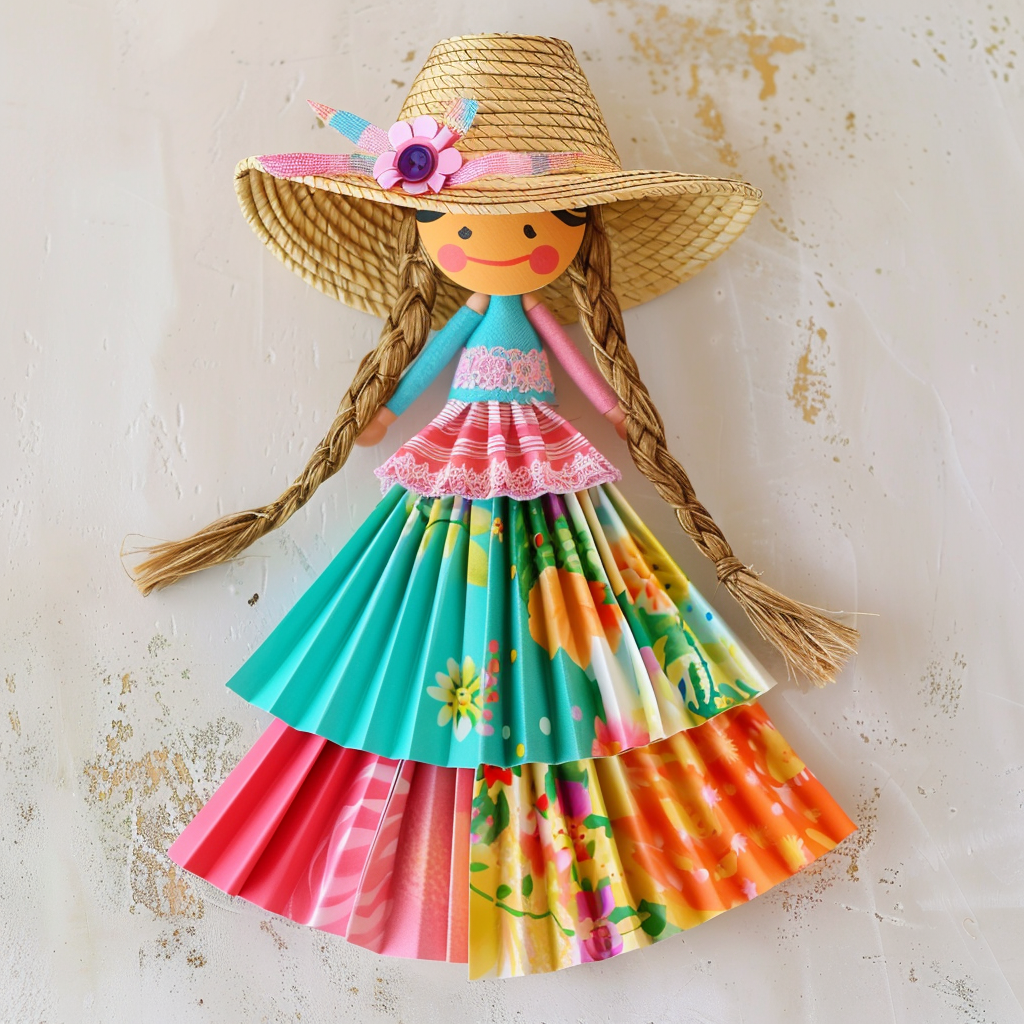
14. Spring Fan Doll Wall Décor
Spring is here! The flowers are blooming, the birds are singing, and everything just feels a bit more cheerful.
Looking to invite that springtime feeling indoors?
Here’s how you can bring in that springtime cheer!
This project is super easy and affordable; you can find almost everything at Dollar Tree.
It also lets you be creative and make something entirely of your own design.
Irresistible reasons why you will adore this Spring Fan Doll Wall Décor:
Dollar Tree Friendly: Spend less on art supplies by shopping at Dollar Tree
Springtime Cheer: Full of bright colors with a whimsical design this wall hanging will surely bring spring into your walls
Easy to Personalize: Set no boundaries for what comes into your mind! You can add all kinds of things to it just as you like.
How To Get Started (You might already have some of this stuff at home):
- Styrofoam Circle or Heart (Dollar Tree has all sorts of sizes)
- Handheld Paper Fans (pick out bright, spring colors!)
- Craft Paint in Spring Colors (optional, if you want to paint the styrofoam base)
- Paint Brushes(Non-mandatory)
- A Small Doll that Has Movable Legs
- Fabric Scraps or Felt Sheets (for the dolls clothes)
- Ribbon or Twine (adds some extra decoration to it and can help you hang it wherever)
- Craft Glue or Hot Glue Gun and Hot Glue Sticks
- Further Options: Artificial Flowers, Buttons, Decorative Braids.
Let’s Make Your Spring Masterpiece!
How to Paint a Base(Optional): You may want to color your Styrofoam base with craft paint. Ensure that it dries completely before you move on.
Fan Fun! This is where the fun begins! Open up your paper fans and arrange them how you like on the styrofoam base. Think of it as having colorful ruffles on a dress! When they look good, stick them into place with glue.
Dress Your Doll: Now let us give our doll a springtime makeover! Cut out an attractive outfit from fabrics scraps or use felt sheets. For eyes, attach buttons while for her hair tie a small ribbon around her forehead.
Attaching Your Doll: Attach your dressed-up doll carefully in the middle of the fan “dress.” Make sure you put it in such a position that the legs will hang down a little bit, this way it will look more whimsical!
Very versatile! Different colored paper fans and other decorations like flowers can be used to make wall hangings for different seasons. Autumn leaves and orange fans would be perfect for fall, or red and white ornaments could make a festive Valentine’s Day decoration.
So get your basket; make a trip to Dollar Tree, round up your supplies, and let’s do an amazing Spring Fan craft.
Doll Wall Décor! A lovely project that celebrates the season and adds some springtime charm at home.
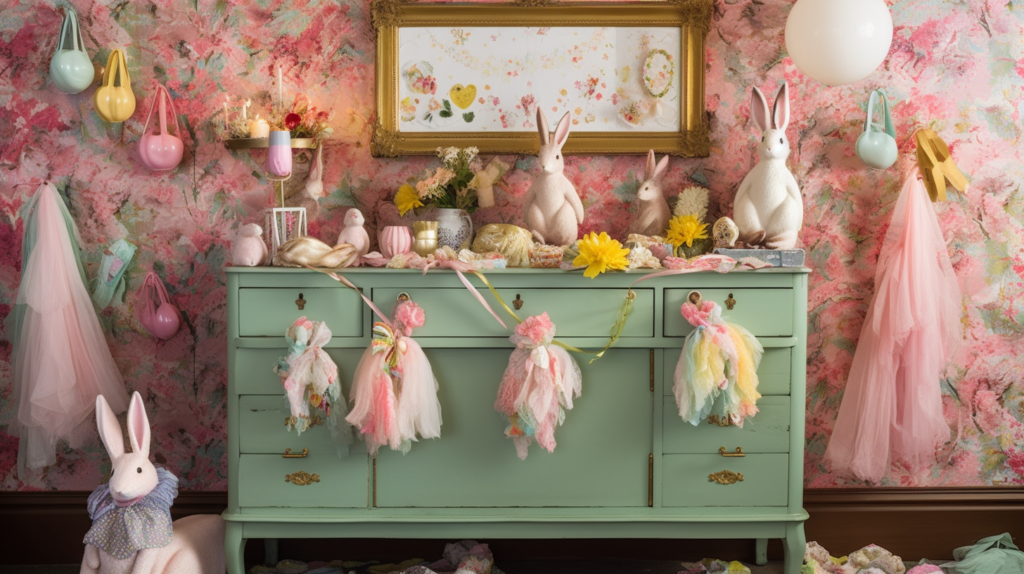
15. Gnome Easter Display
Easter is around the corner with spring already being here!
Looking for something that will help add some whimsy or fairytale charm into your Easter decorations? Consider gnomes! These little creatures are often found in gardens and love spring, which makes them perfect for Easter.
Most of the things I used to create this adorable Gnome Easter Display were from Dollar Tree.
It is super cheap and easy to make, and these gnomes would be a nice addition to your tiered trays, mantels, or any other place in your house.
Why you will fall in love with this Whimsical Gnome Display:
Affordable at Dollar Tree: Have some fun crafting and save some money using what you can buy from Dollar Tree!
The Magic of Gnomes: When it comes to Easter decorations, gnomes bring out the whimsy and cuteness of fairytales.
Customizable as You Like: Set up your gnome display the way you want it and create a unique scene.
Here’s what you’ll need to get started (you might already have some of this stuff at home!):
- Small Figurines (preferably sitting or standing gnomes)
- Faux Floral Bushes or Moss (to make a base for the display)
- Mini Terracotta Pots or Tin Buckets (optional if wanting gnome homes)
- Craft Paint in Spring Colors (optional if painting the gnomes)
- Paint Brushes (optional)
- Fabric Scraps or Felt Sheets (for making gnome hats/accessories)
- Buttons, Craft Pearls, or Small Twigs (to give them character)
- Craft Glue or Hot Glue Gun and Hot Glue Sticks
- Optional Extras: Miniature Carrots, Wooden Signs, Decorative Easter Eggs
Let’s Craft Your Whimsical Gnome Display!
Gnome Makeover (Optional): Feeling artistic? You can utilize art paints to grant your gnomes a spring makeover with soft hues. However, ensure that the paint is wholly dry before proceeding.
Creating a Gnomey Base: Begin by creating a base for your gnomes. For example, cover a small tray, plate or shallow box with artificial flower bushes or moss to make it look like grass.
Gnome Homes (Optional): If you want your gnome to live inside a little house, use terracotta pots or tin buckets in any color of the spring season as your canvas. Give them time to dry. And if you want something extra special then add a small wooden dowel together with a cute sign that you painted yourself.
Gnome Fashion Fun: Now let’s dress our gnomes up! Cut out adorable hats from felt sheets or fabric scraps. You can also put on tiny beards made of white felt or yarn.
Accessorize Away! It’s high time we made our gnomes feel really special! For instance, one may use craft pearls as buttons for their clothing, twigs as walking sticks and buttons for eyes on their bodies.
The Finishing Touches: Organize your base flowers, Easter eggs and gnome homes (if used) including miniature carrots and other decorations in an Easter design around it. This is a good project to do with your family. You can let everyone craft his/her own unique gnome and then have them all set up for display.
So get your basket, go to Dollar Tree, collect items and prepare yourself to make a whimsical Easter Gnome Display! These cute gnomes are a nice way of celebrating the season and giving an extra touch of magic on your Easter decorations.
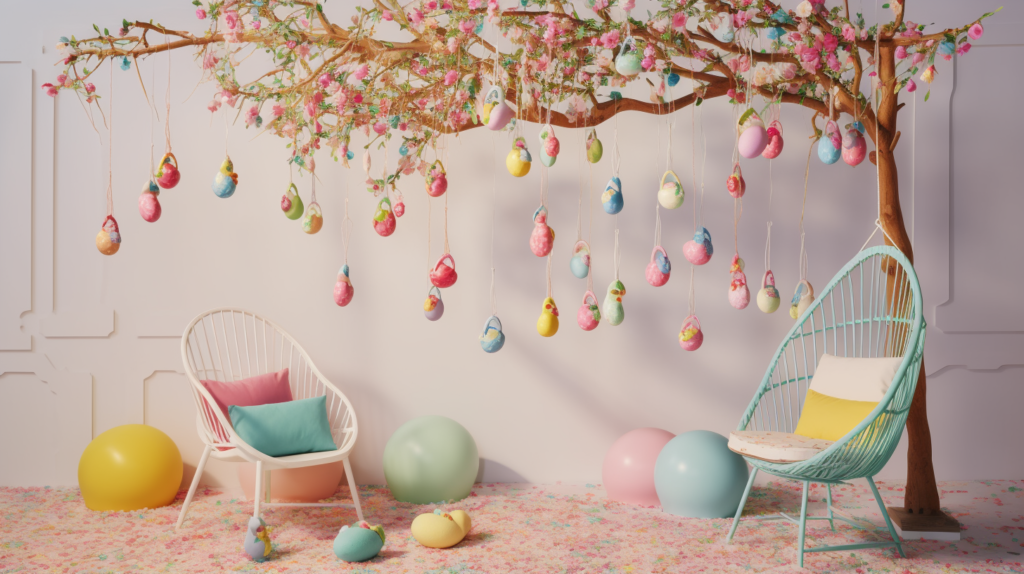
16. Foam Egg Fun and Décor Ideas for Easter
Spring is here and Easter is just around the corner!
It’s decorating time! Here are some fun ideas for using foam eggs in making beautiful Easter decorations that you can find on this blog post. Some are quick others take longer; there is something for all.
The best part? Many can be accomplished with cheap foam eggs from Dollar Tree!
This is why you will adore working on foam eggs as your Easter décor:
Endless Possibilities: Foam eggs are like blank canvases! They can be painted, drawn on or cut into for creating something totally new.
Budget-Friendly Fun: Foam eggs are very affordable so you can buy many of them without straining your budget.
Family-Friendly Fun: This is a great activity for the whole family. Anyone in the family could participate since it requires no expertise or mess.
Let’s get into some wonderful foam fun with eggs!
Traditional Easter Egg Decorating:
Dyeing Delight: This is an amusing Easter tradition! Take an easter egg dye kit and turn the foam eggs into colorfully interesting things. Use them to try out different shades, patterns and techniques.
Sharpie Chic: If you want a quick option, use a variety of colored Sharpie pens to draw on your foam eggs.
Glitter Glam: Do you need that glitter? You can add glitz to your eggs with glitter glue or loose glitter. You may wish to cover the whole egg in glue and sprinkle it with glitter, or create a pattern instead.
Creative Foam Egg Transformations:
Bunny Bonanza: Convert your foam eggs to cute bunnies! Cut ears and tails out of felt cloth or construction paper then stick them onto the egg. The eyes can be made using either buttons or markers as well as a beautiful pink nose.
Floral Fancy: Make pretty blooming flowers!
Cut foam eggs in half and arrange the pieces like flower petals. To make them bright, use different colors. Use hot glue within it for the stamen with button or pipe cleaner centered
Chickadee Cheer: Some little chicks are sure in place! Paint your eggs yellow and add orange beaks from construction paper or markers as well as black eyes too.
Décor Inspiration with Foam Eggs:
Garland is simply egg-cellent: Join your decorated foam eggs along using either string or twine to make an Easter garland for the festive moods. It will be ideal across a doorway, on your mantel or any other place which lacks some Easter happiness.
Wonderful Woven Basket: Instead of utilizing a basket, why not try making one out of foam eggs? Take great care when cutting these eggs into halves and then intertwine them together upon wire cleaners so as to create an exclusive and bright basket.
Tabletop Eggstravaganza: Use these around your Easter table setting for a touch of whimsy. Or you can place them in a bowl filled with crumpled colored paper or moss to make a centerpiece.
Bonus Tip: Don’t just think Easter eggs! There are more shapes made from foam other than just the Easter egg at Dollar tree such as hearts, stars etc., which you can use in making more spring decoration or have them together with the foam egg designs for more funnier display.
So take your basket full of foam eggs and gather your craft supplies because we are about to create some great Easter décor!
These simple foam eggs could become beautiful and festive decorations that will add a touch of springtime charm to your home this Easter season, if you use your imagination.
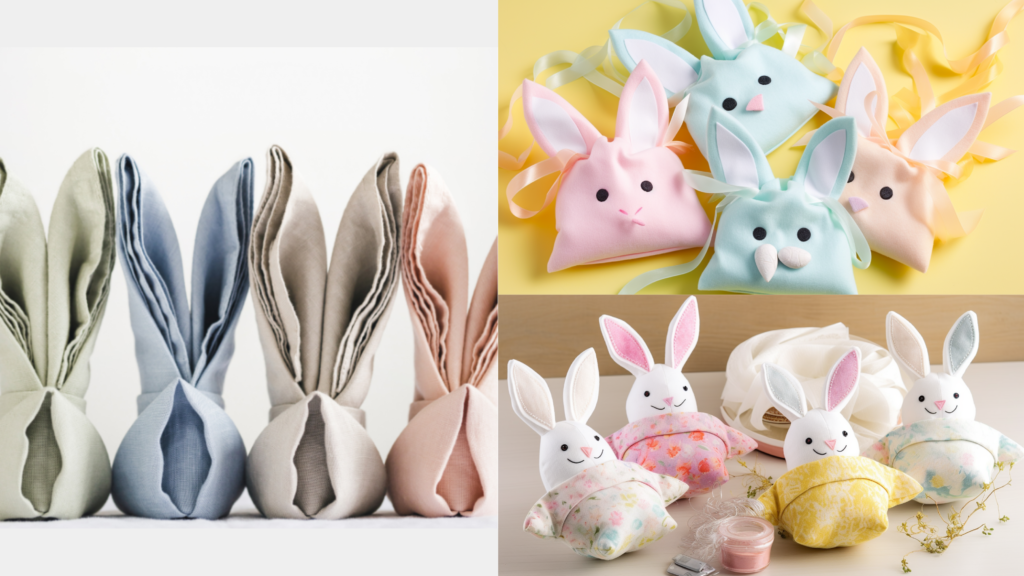
17. Boo-Boo Bunny Craft
The remembrance of winter is the sign of another Easter!
Looking for a fun and easy Easter craft to do with your kids? How about making an adorable Boo-Boo Bunny? This is a lovely uncomplicated effort using mostly materials from Dollar Tree which means it is also kind on your wallet.
What’s unique about the Boo-Boo Bunny craft?
Dollar Tree Friendly: Save some money and have fun crafting with supplies from Dollar Tree!
Perfect for Little Hands: Even young children can do this; just assist them, please.
Teaches Empathy & Kindness: Talking about the boo-boo bunny’s bandage is a great way to chat with your kids about caring for others.
To get started (you might already have some of this stuff at home!), here’s what you’ll need:
- Small Paper Plates (white or pastel colors)
- Craft Paint in Pink, White, and Black (optional, if you want to paint the paper plates yourself)
- Paint Brushes (optional)
- Cotton Balls or White Felt Scraps (for the bunny’s belly)
Bunny Ears Hop!: Cut out two large floppy ears from the left over white paper plate or use some pre-cut white felt if you have any.
- Pink Pipe Cleaners (cut up for bunny’s nose)
- Wiggle Googly Eyes (optional)
- Bandage Stickers or Fabric Scraps (for the bunny’s boo-boo)
- Glue Stick or Craft Glue
- Markers (optional, for drawing details)
Let’s Craft Your Boo-Boo Bunny!
Painting Fun (Optional): If you want to add a pop of color, go ahead and paint your paper plates pink or any other pastel color. Just make sure to let the paint dry completely before moving on.
Shaping the Face: Glue cotton balls or white felt scraps in the center of the painted paper plate to make a fluffy belly.
Let’s Get Crafty! Time to add a face! Glue on wiggle googly eyes {or just draw some eyes with black marker} and a little bit of pink pipe cleaner should be added as its nose.
Boo-Boo Time: But here comes the emotional part! Stick one bandage sticker or rather attach one small fabric scrap in shape of bandage onto bunny’s belly.
The Finishing Touches: Use markers to draw whiskers and a cute smile on your bunny face. Additionally, you could include other things like tiny toes or tail etc.
Here it is! Your cute Boo-Boo Bunny craft is done! These little bunnies with band aids are a thoughtful way for children to show kindness and concern.
Bonus tip: This craft can also be turned into a get-well card! Write a sweet message on the back of the paper plate and display your Boo-Boo Bunny for someone who is unwell.
So grab a basket, head over to Dollar Tree, gather some supplies and let’s make some boo-boo bunny love!
This heartfelt craft provides great entertainment for kids and teaches them important values about being kind during Easter.
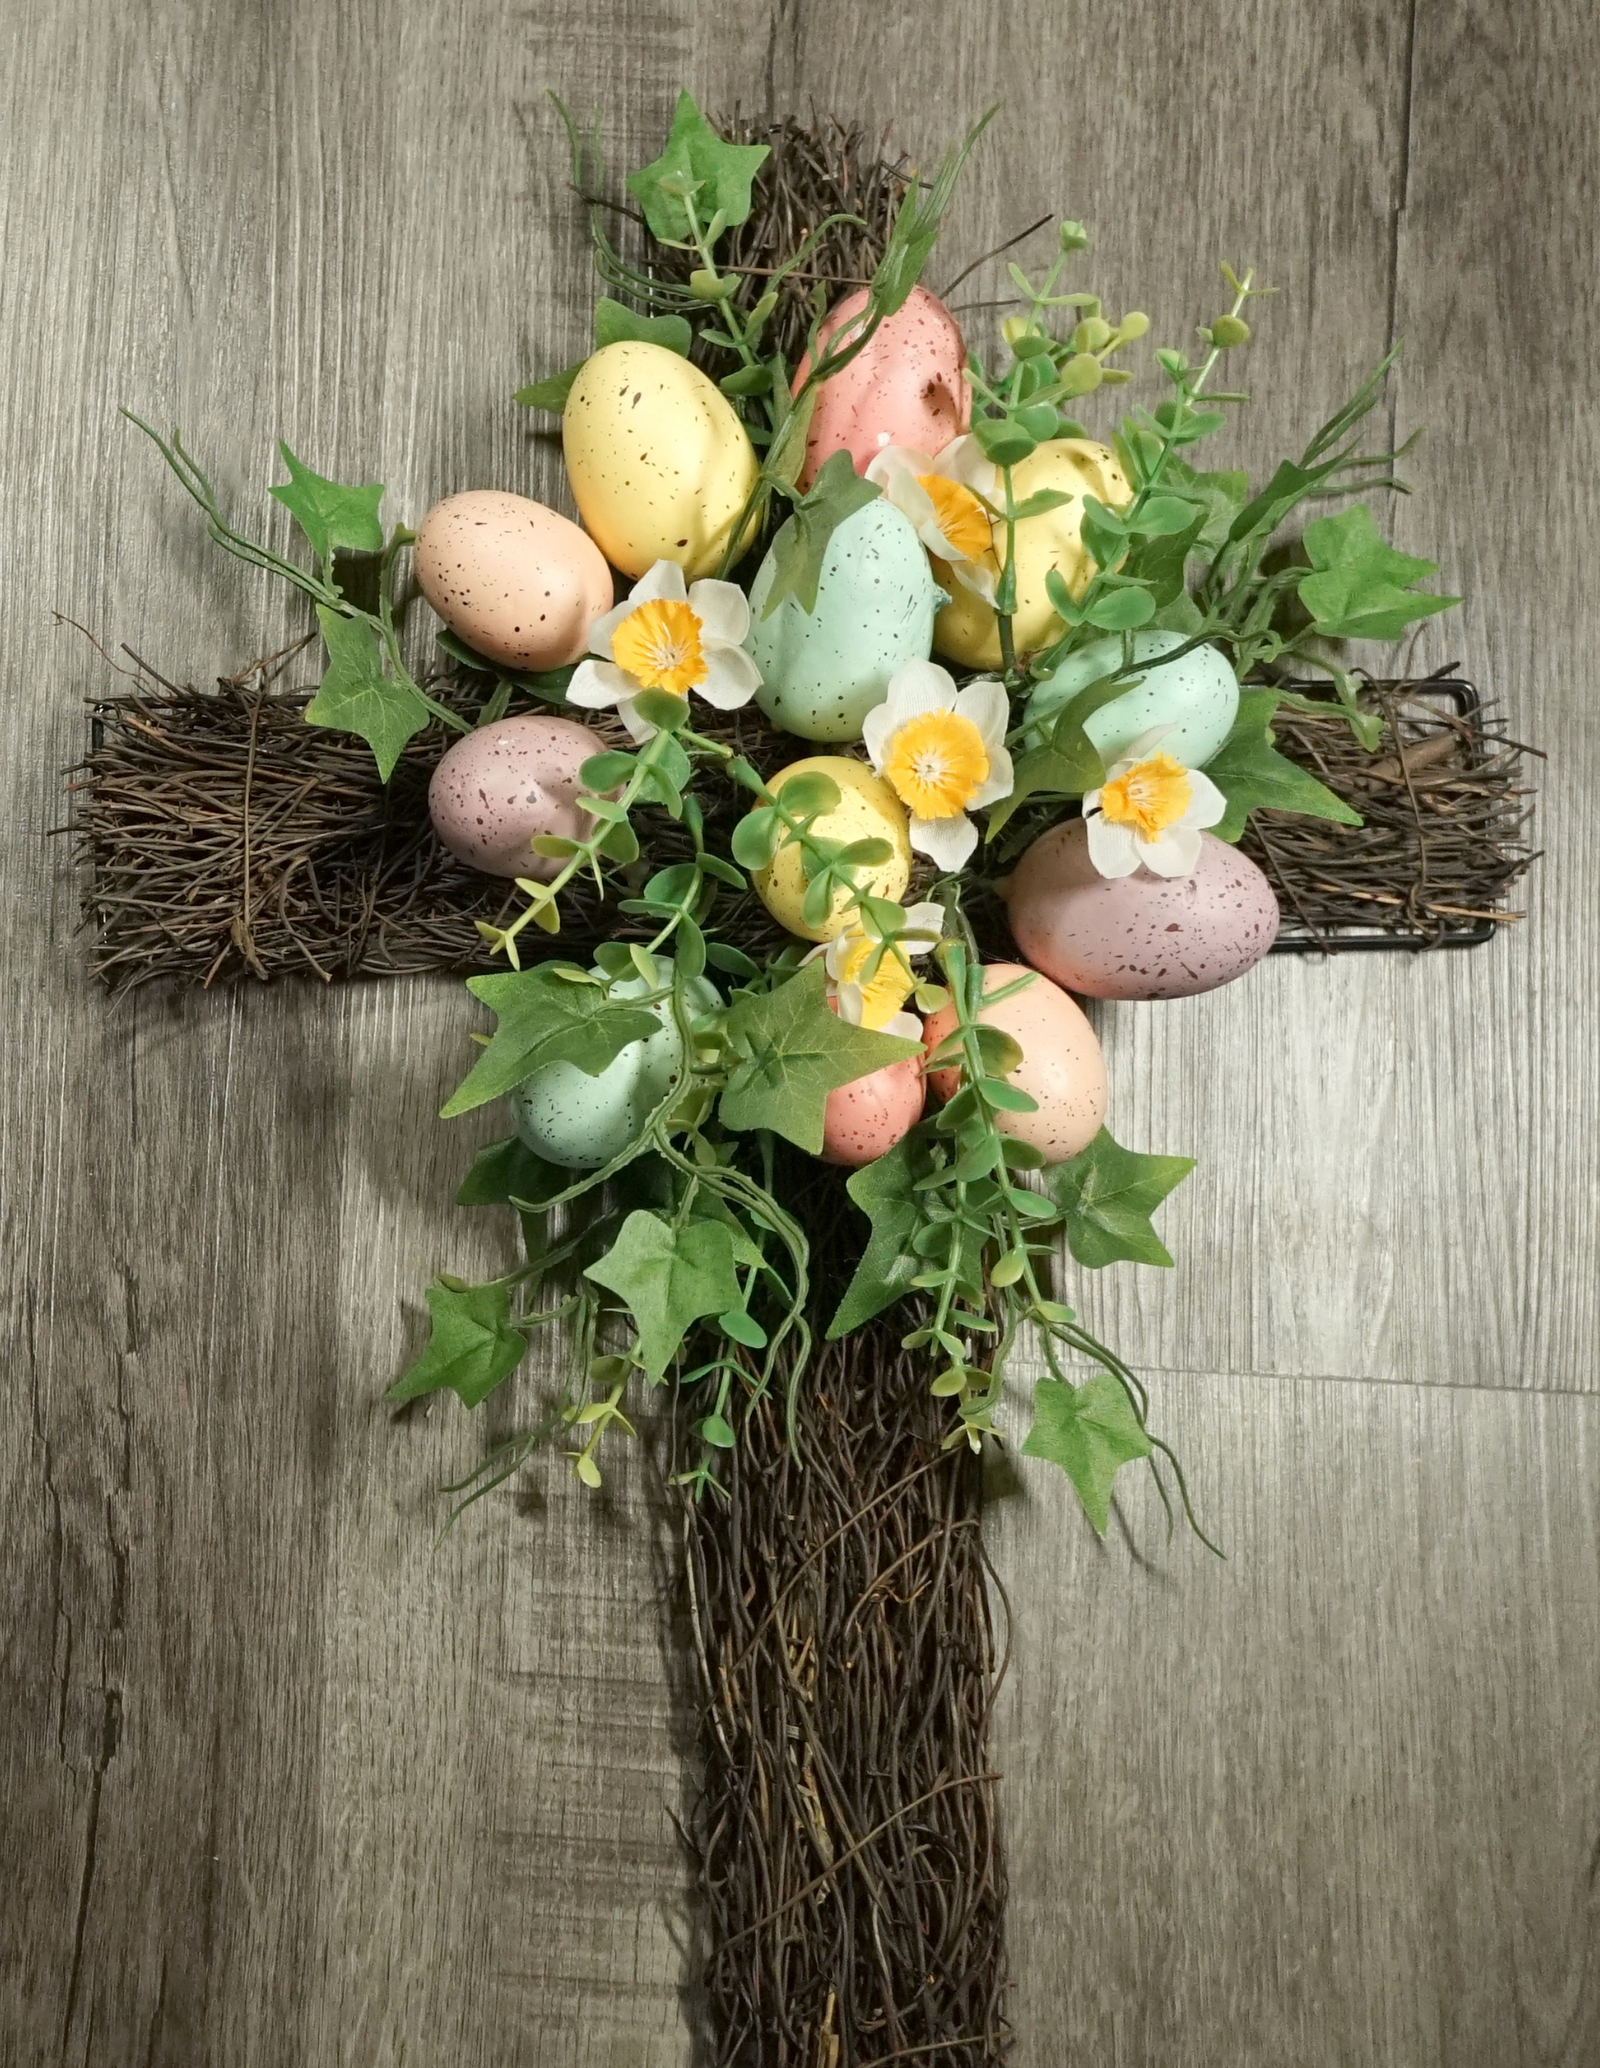
18. Spring Floral Cross Wreath
It is springtime. The colors are popping everywhere in nature, which makes it an ideal time to bring some of that beauty into your house.
In this post, you will learn how to create the most beautiful Spring Floral Cross Wreath mostly out of things you can find at Dollar Tree without going broke!
Anyone who loves flowers or appreciates what the cross symbolizes will enjoy making this project.
In a matter of seconds, you can make an attractive wreath that will be great for your door or wall throughout spring or Easter decorations.
Why is this Spring Floral Cross Wreath so brilliant?
Dollar Tree Friendly: Save money by crafting with items bought from Dollar Tree!
Springtime Elegance: Bursting with colors of flowers, it is the perfect wreath to honor the season.
Symbolism and Beauty: The cross shape adds meaning to it, making it a fantastic Easter decoration.
To get started, gather these supplies (you might already have some at home!):
- Foam Cross Wreath Form (Dollar Tree has different sizes)
- Artificial Floral Bushes (in various spring colors and textures)
- Floral Wire or Pipe Cleaners
- Greenery Foliage (optional, to make your wreath fuller)
- Ribbon or Twine (to hang your wreath)
- Hot Glue Gun and Hot Glue Sticks (optional)
- Scissors
Let’s Make Your Spring Masterpiece!
Flower Power: First, you’re going to have to pull apart the flowers from the stems of the artificial floral bushes.
Try getting different sizes and textures so that you’ll have a full-looking interesting wreath.
Greenery Touch (Optional): For those who want to include some green, snip sprigs from your greenery foliage and wrap them about the foam cross wreath form. To make sure that they are in place, use floral wire or pipe cleaners.
Blooming the Cross: This is where the fun begins! Start attaching flowers to the foam wreath. In this case, you can use a hot glue gun and floral wire for stability.
Tip: If you tuck floral stems beneath foam loops on the wreath, then secure them using floral wire, it will look more natural.
Filling It In: Continue adding flowers, moving around the wreath form until it’s covered completely with blooms. Don’t be afraid of mixing colors and textures to create a vibrant effect.
The Finishing Touches: After filling up your wreath beautifully, tie some ribbon or twine into a loop so that it can be hanged up. Glue or floral wire may be used for fixing loop on backside of wreath form.
Voila! You have just completed your incredible Spring Floral Cross Wreath! This beautiful symbolic wreath is perfect for celebrating Easter or bringing spring into your home.
Bonus Tip: This wreath has a lot of possibilities. And it’s possible to change it up for other seasons. Use fall-colored flowers and leaves for the autumn season, or switch to red and white florals for Valentine’s Day.
So grab your basket, head to Dollar Tree and get what you need and ready yourself for a spring floral
Cross Wreath! This is an inexpensive, enjoyable way to welcome in the new season as well as make an original decoration that will be full of meaning around our homes.

19. Six Ways to Decorate Spring Cupcakes
Spring has sprung! The world is alive with color, making this the perfect time to bring some cheer into your kitchen by making these cute spring cupcakes.
This blog post shows you how to decorate your cupcakes six different ways that are fun and easy for this season; most of the decorations can be found at Dollar Tree so there’s no need for going bankrupt.
These ideas work regardless of whether or not you have ever baked before. So preheat that oven, bake up your best cupcakes, and then be ready to turn them into mini works of art representing the springtime feeling!
Why you will fall in love with these spring cupcake ideas:
Dollar Store Delight: Save some money and have fun crafting cupcakes with stuff from the dollar tree.
Easy & Fun: So simple to do, even new bakers can produce “wows” by their creations.
Endless Creativity: Start here then let your mind be wild for personalized pieces!
Here is what you’ll need (you may already have a few things at home!):
- Your best cupcake recipe and ingredients
- Frosted cupcakes (any flavor)
Decorating materials (read below for each idea)
Six Ways to Decorate Your Spring Cupcakes:
* Adorable Bunny Bonanza:
Shredded coconut is required for bunny fur, black decorating icing or candy melts are needed for eyes and nose, pink candy melts for the nose, jellybean candies make the ears.
To start with, use black icing or a candy melt to get a black dot at the center of the cupcake that serves as an eye.
Then a smaller pink dot should be made adjacent to it which would represent its nose. For making ears simply coat the sides of your cupcake with some melted white chocolate if you wish while sticking on it some jellybean candies.
* Chicken; Chicken hip hooray
You will require yellow candy melts, orange candy melts for the beak, black decorating icing for the eyes and mini candy chicks (optional).
Here is how: dip your cupcake in melted yellow candy melts. You could then press some strands of coconut on the cupcake sides gently when the candy melts are still wet to look like feathers.
When the melted candies harden, put black icing dots as eyes and a small orange triangle shape for a beak. In case you want to you can also crown your cake with a cute little pre-made chick made out of confectionaries
* Spring Flora Fad:
You’ll need sprinkles in all kinds of colors and fun shapes (flowers, butterflies and ladybirds) as well as piped frosting flowers (optional).
* Egg Nest Surprise:
What you will need is shredded wheat cereal or “nest,” pastel colored candy melts, and mini Robin’s eggs candies.
Here is what you should do: frost your cupcakes lightly using pastel colors. While the frosting is still moistness sprinkle them with several diverse springtime themed colorful sprinkles. If you wish you can make it more special by adding on piped butter cream flowers or maybe few tiny sweets.
* Surprising nest egg
You will need same as the recipe above.
To make them do this: Arrange a small area of shredded wheat cereal near the bottom part of the cupcake in a circle form to look like a bird’s nest. Then, melt pastel colored candy melts and pour it over the cupcake and nest resembling speckled eggs. Lastly, insert a mini Robin’s egg candy into it.
* Rainbow sprinkle delight
You will also need multi-colored sprinkles and various pastels in vanilla frosting.
To make them do this: Stripe your cupcakes with pastel colored icing. Decorate them with many sprinkles while they are still moist. Simple & elegant chocolate dip. You will also need sanding sugar in spring colors (optional).
To make them do this: Plunge the tops of your cupcakes into melted chocolate candy melts. While it is still wet, pour some colorful sanding sugar on top for that glittery touch of springtime.
Let Your Creativity Blooms!
These are just some ideas to get started with. Make your small cakes, baby shower or Easter brunch beautiful by making them look like springtime art with a few things from the Dollar Tree.
Bonus Tip: Include everyone in this activity! Allow them to choose their desired candies or sprinkles and make unique customizations.
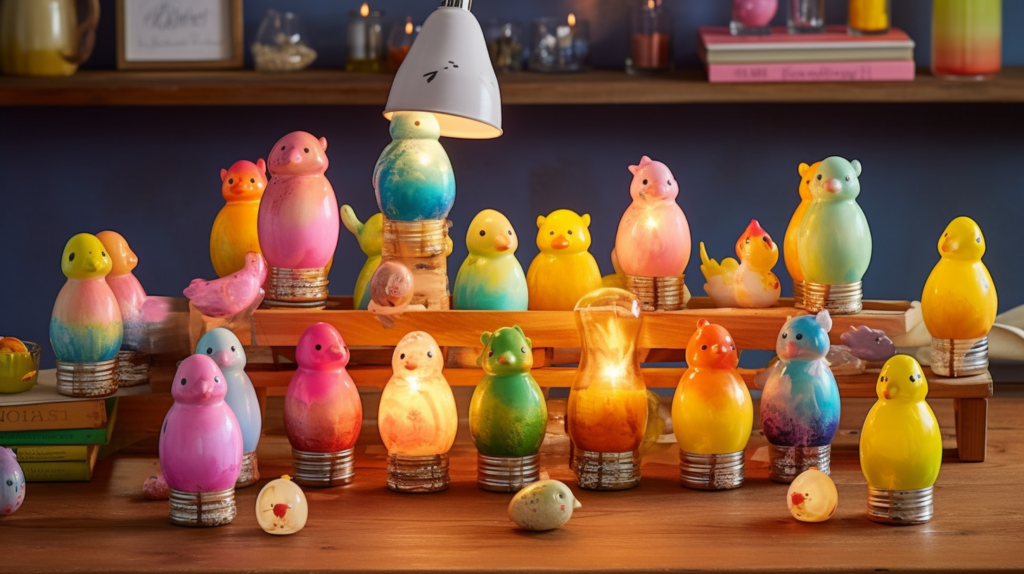
20. Light Bulb Easter Bunnies and Chicks Craft Idea
Spring is fast approaching and so is Easter!
Looking for an interesting way to decorate for the season? Then this blog post will teach you how to transform old light bulbs into cute little Easter bunnies and chicks!
So it gives new life to old things which is great if you are trying to be green plus, it’s a fun project for the whole family!
Why You’ll Love This Upcycled Light Bulb Craft:
Eco-Friendly Fun: Instead of throwing away those old light bulbs, turn them into cute Easter decorations!
Dollar Store Delight: Save some money and have fun crafting with supplies from Dollar Tree.
Perfect for All Ages: This craft is easy enough for everyone to do, from kids to adults.
If you have the following things, then you can proceed (you may have some of these already at home!):
- Used Light Bulbs (different shapes and sizes are all good)
- Acrylic Craft Paint in White, Pink, Yellow, Black (and any other colors you like)
- Paint Brushes
- Pipe Cleaners (various colors)
- Wiggle Googly Eyes (optional)
- Felt Scraps or Fabric Scraps (optional, for details like ears and beaks)
- Ribbon or Twine (for hanging)
- Craft Glue or Hot Glue Gun and Hot Glue Sticks
- Markers (optional, for drawing details)
DIY Time!
Clean Up Crew: You will need a wet cloth to pick up dust or dirt on your old light bulbs before painting. Ensure that they get completely dry first.
Painting Time: The fun starts now! Choose to paint your light bulbs white or any base color. Make sure that the paint is dry before progressing on.
Bunny Ears Hop!: Now let’s create bunny ears! Get two pink felt pieces or pipe cleaners cut into long floppy ears. When using pipe cleaners as material, bend their bases to give them some shape. Lastly glue the ears firmly at the top of painted light bulb parts screw area.
Chickadee Beaks: Cut out small triangles of orange felt or paper for the beaks. Glue them near the top center of the painted light bulb, making sure it is secure.
Let’s Get Crafty! These guys need some personality. Attach wiggle googly eyes (or black marker) to their faces so they have eyes. Also, you can draw whiskers with a black marker or put on a tiny puff of cotton for chicks’ tails.
The Finishing Touches: Are you creative? You can make a bunny nose by cutting little ovals out of pink felt or let your chick wear a pipe cleaner as its scarf. The choices are all yours!
Hang in There!: Slice off a short piece of ribbon or twine and then create a loop for hanging it. Stick it onto the metal screw part of the bulb using glue.
Voila! Your cute bunnies and chicks made from old bulbs are ready to use! These little friends will bring Easter cheer to your home accessories.
Bonus Tip: This project is great for an evening family activity night! It’s a great idea to get everyone involved in decorating their own light bulb bunny or chick and make a whole Easter menagerie!
So, grab your basket (and those old bulbs!), go over to the Dollar Tree for supplies and let us do some environmentally friendly Easter crafting!
This is an upcycled craft that enables you to be creative, save money, and have lovely unique Easter decorations around this season.
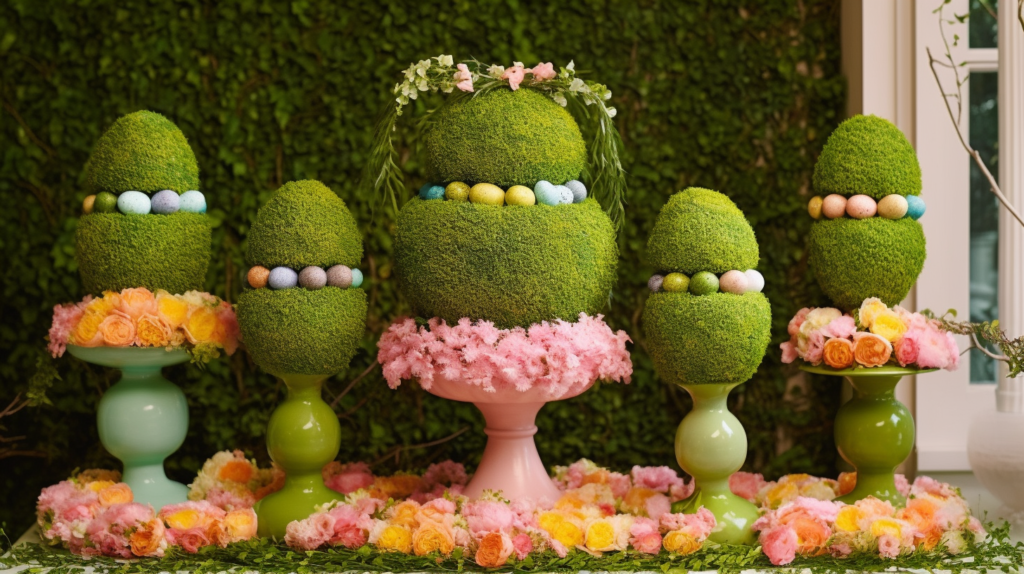
21. Topiary Peeps Décor
Spring is here and Easter is just around the corner!
Fun time, candy, and of course decorations; these are what come in mind when I think about it. This blog post will show you how to create adorable and unique topiary flowers using everyone’s favorite Easter treat – Peeps!
This would be a perfect project to add something quirky and lighten up your Easter decor with something simple. And the best part is, delightful
Peeps flowers that you can make quickly with supplies from Dollar Tree!
Why You’ll Love DIY Topiary Peeps Flower Décor:
Peep-tastic Fun: Put those leftover Peeps (or favorite colors of yours!) into good use by creating cute looking flower decorations for Easter.
Dollar Store Delight: Save some money while having fun making stuff out of things you bought from Dollar Tree.
Perfect for All Ages: This craft is easy enough for everyone, including the kids.
Here’s what you’ll need to get started (you might already have some of this stuff at home!):
- Peeps of bags (in myriad colors so your flowers can be really bright!)
- Different sizes floral Styrofoam balls
- Crafting sticks or Lollipop Sticks
- In case you want to hold your flowers small terracotta pots or tin buckets are also available as an option.
- Floral moss is optional in the pots
- Optional greenery foliage for fuller look
- Optional ribbon or twine decoration
- Hot Glue Gun and Hot Glue Sticks
Let’s Make Some Peeptastic Flowers!
Peep Power: First, separate your Peeps by color. You can use all one color for a simple look or a bunch of colors
for a bright flower.
Poke and Stick: Carefully poke a craft stick or lollipop stick into the bottom of each Peep. This will be the stem of your Peeps flower.
Building the Bloom: Take out your hot glue gun and begin securing the Peeps around the floral Styrofoam ball. Starting at the bottom, work up while gluing them together closely so that you get a full and colorful flower head.
Optional Potting It: In case you want to place your Peeps flower in a pot, put some floral moss at the base of a small terracotta pot or tin bucket. After that, you can gently insert the craft stick stem of your Peeps flower into the moss so as to keep it in position.
Optional Leaf it to You: Closer to the Peeps flower head, you could tuck some sprigs of faux greenery.
The Final Touches: Cut out a tiny bit of ribbon or string and wrap it around the base of a Peeps flower’s
stem then tie an adorable little bow for extra cuteness.
Voila! Your cute DIY Topiary Peeps Flower is done. They are such fun and festive decorations perfect for Easter
celebrations.
Extra Tip: Be creative with color; paint all flowers one color or mix them up for unique patterns.
So, grab your basket (full of Peeps!), go to Dollar Tree and get ready to create some
Peeptastic fun! This simple, imaginative project adds spring cheer to your Easter decoration while bringing smiles on everyone’s face.
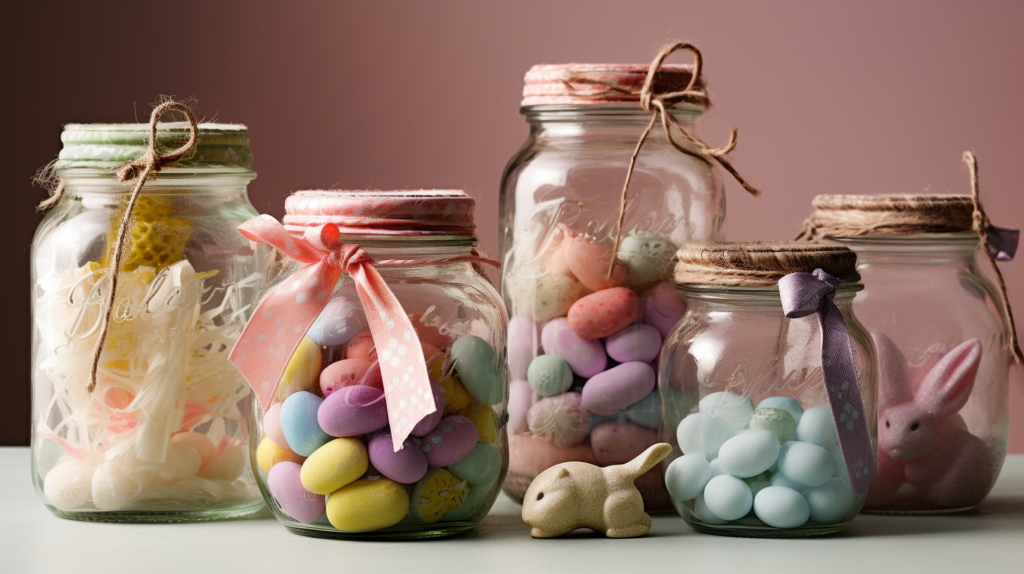
22. Decorative Easter Craft Jars
There is a feeling of Spring in the environment and Easter is upon us.
During this period, you need to revamp your home decoration and be innovative. This blog post offers 27 ways of transforming normal jars into beautiful Easter candles. Use Dollar Tree’s products for a cheap but creative craft experience.
The reason you will love Decorative Easter Craft Jars:
Dollar Store Delight: Save money and have fun crafting with supplies from Dollar Tree.
Infinite Possibilities: Let your imagination go wild! Decorate them as bunnies, rabbits or maybe flowers.
Functional and Festive: These decorated jars aren’t just cute, they’re useful too! You can store candy, Easter egg decorating supplies, or even small gifts in them.
Here’s what you’ll need to get started (you might already have some of this stuff at home!):
- Different sized and shaped glass jars
- Spring colored acrylic paint (pastel pinks, yellows, blues and greens)
- Paint brushes
- Easter decorative moss (optional)
- Ribbon or twine
- Craft glue or hot glue gun plus hot glue sticks
- Washi tape with Easter designs (optional)
- Bunny silhouettes stickers/bunny button/foam shapes – chicks/flowers etc.
Let’s Get Crafty!
Clean Up Crew: Begin by washing your glass jars with soap and water to eliminate any dust or dirt. Allow them to dry fully before painting.
Painting Time: Now comes the fun part! Paint your jars one solid color or for those feeling more creative, use stencils or washi tape to create a funky design.
Moss for Springtime Charm (Optional): If you wish, you can put some decorative Easter moss at the bottom of your jar as an additional springtime touch.
Get Creative! Now it’s time to decorate your jars. Below are some ideas that can help:
Bunny Bonanza: Use stencils or stickers with bunny shapes on them. Add googly eyes, and button noses so they look cuter than ever.
Chickadee Cheer: Paint your jars yellow and make black stripes across them as well as orange beaks which will transform them into lovely chicks.
Springtime Floral Fancy: Again, paint flowers on the jars using stencils or you could use buttons and ladybug-shaped stickers too.
The Finishing Touches: Finally, when you have finished your design as expected take a ribbon or twine and tie it around the lip of the jar.
Furthermore, you can as well hot glue on extra decorations such as Easter eggs or miniature carrots.
There it is! You have successfully made cute-looking Easter craft jars. They are also functional and ideal for spring themed house decors
Bonus: Fill your jars with colored Easter egg decorating supplies, personalized gifts or candy for a more unique look.
Therefore, go to dollar tree first in order to buy the materials that we need and be set to create your own decorative Easter craft jars!
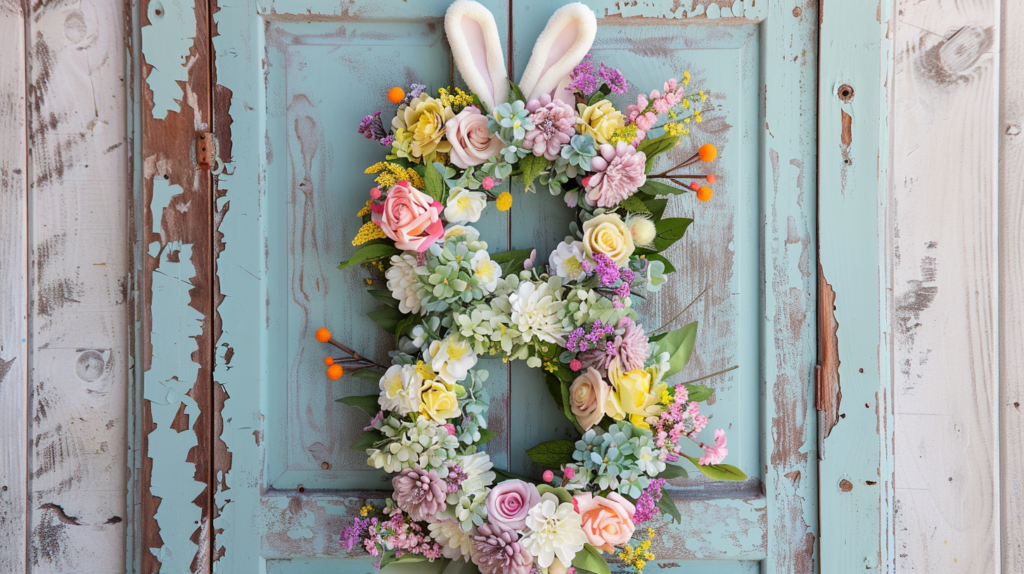
23. Make a Bunny-Approved Easter Door Wreath
Easter is just around the corner and spring is in the air!
So, let’s celebrate a season of new beginnings, the beauty of spring and cute bunnies what do you say? In this blog post we will demonstrate how to make an adorable Bunny Easter Wreath using supplies that are both fun and affordable from Dollar Tree. This project will add some whimsy and Easter cheer to your door or wall decor!
What Makes this Craft Special?
Dollar Store Delight: Cut costs while having a good time with the materials from Dollar Tree.
Easy-Peasy Bunny Fun: With easy-to-follow instructions using readily available materials, this craft is suitable for all ages and skill levels.
Adorable and Versatile: Besides being an Easter wreath, it can also suit other spring festivities.
To get started here’s what you’ll need (you might have some of this stuff already!):
- Foam Wreath Form (any size)
- White Faux Fur Fabric (by yard or pre-cut squares)
- Pipe Cleaners (white and pink for ears)
- Wiggle Googly Eyes
- Pink Fabric Scrap (for the nose, optional)
- Fabric Scissors or Pinking Shears (optional, for a more whimsical look)
- Ribbon or Twine (for hanging)
- Hot Glue Gun and Hot Glue Sticks
- For the Craft Glue
The Craft Your Soft Ring!
Enjoyment with Fur: Start by cutting up your white faux fur fabric into pieces. The ring appears fuller depending on the width of the slices. Instead, cut strips about an inch wide if you want a more heavy and textured one. These strips should be slightly longer than the diameter of the form.
Finishing off the Decoration: Take one strip of fur at a time and hot glue it onto the foam wreath form.
As you work around this wreath form continue to overlap the ends of each fur strip until it is completely covered in soft and fluffy white fur.
Bunny Ears Time! Now let’s have some fun!
Use two pipe cleaners, one white and another pink to make bunny ears per piece.
You can twist them together at their lower halves for added dimensionality.
Make two full bunny ears after repeating this step again.
On top center attach these bunny ears using hot melt adhesive.
Let’s Get Crafty!
It’s now time to make your bunny wreath look more personal!
Have googly eyes that wiggle when others are looking at him and see how cute he is!
Also, you could cut a small heart shape from your fabric scrap and glue it on for a bunny nose (use craft glue, which is great for use with fabrics).
Finishing Touches: Take a ribbon or twine, make a loop for hanging and attach it to the back of the wreath form with a drop of hot glue.
Voila! You have an adorable Bunny Easter Wreath. Spring will be here soon and we all love celebrating Easter with this cute fuzzy thing.
Bonus Tip: Feeling extra creative? Use fabric scraps to make tiny carrot or flower embellishments that can be added to your bunny wreath.
So get your basket and hit up the Dollar Tree for supplies because you are about to create some bunny fun. This easy project is so incredibly cute and will bring the Easter spirit into your home décor!
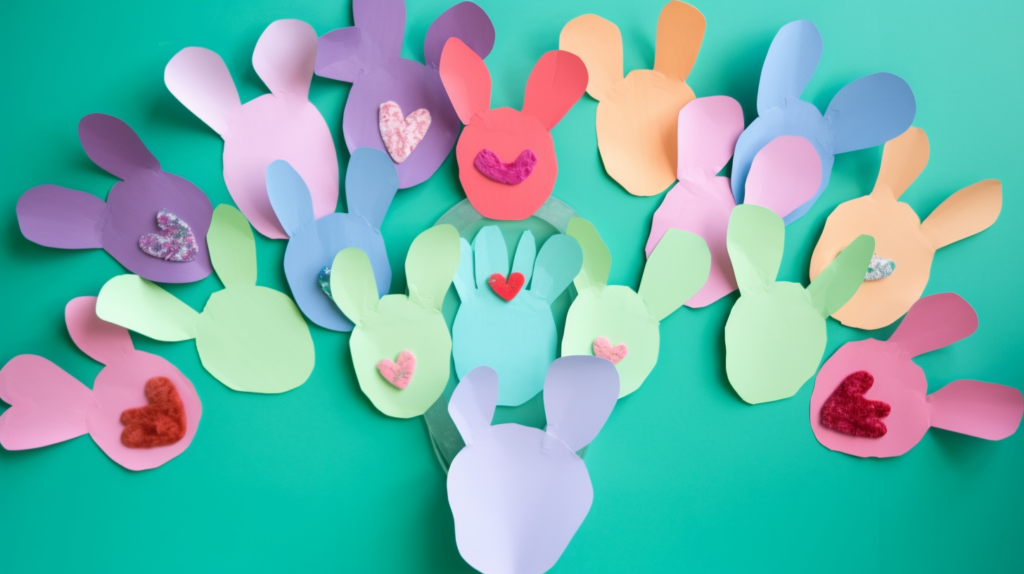
24. Bunny Hand Bulletin Board
It is springtime now and Easter’s day draws nigh!
In sum, it’s time for creative thinking, having fun through activities as well as making cute bunny crafts. In this post learn how to create an adorable Bunny Hand Bulletin Board using interesting and economical materials from Dollar Tree.
This project is great for the classroom, afterschool programs or even a home’s Easter decoration.
Why You’ll Love This Craft:
Dollar Store Delight: Save some money and enjoy crafting with supplies from the dollar tree.
Little Hands, Big Fun: It’s an easy craft to do with young kids hence ideal for their creative and fine motor skills development.
Adorable and Versatile: Although it is best suited as an Easter bunny decoration, this hand can be applied in other spring themes or used as a classroom display.
Here’s what you’ll need to get started (you might already have some of this stuff at home!):
- Construction Paper (pink, white, black)
- Craft Scissors or Pinking Shears (optional – adds whimsy)
- Wiggle Googly Eyes
- Glue Sticks
- Markers, Crayons, or Colored Pencils (optional – details!)
- Ribbon Or Twine (optional for hanging)
Let’s Craft Your Cuddly Bunny Hand!
Trace Those Fingers: Begin by taking a pink construction paper sheet. Rest your child’s palm on one side of it before tracing his/her
hand to cut out its shape.
Bunny Ears Hopping By!: Take your white construction paper and cut out two long ovals that would form the bunny ears.
Make floppy ears by folding up the bottom third of each oval.
Let’s be creative! Now, let us do bunny hand. Stick the floppy ears to the upper side of the pinky hand cutout.
Give your bunny a cute stare with wobbly googly eyes. You can also use pens, crayons or colored pencils to add things like whiskers, a nose and a little smile.
How about adding some final touches? To make small bunny fingertips for each finger tip, draw circles on white construction paper and fill in pink in the center. You could alternatively just use pink markers to draw small bunny nails directly onto the hand instead of cutting it out.
Bunny Hand! (Optional): For those who want to display their bunny hands on a bulletin board; they can cut a small piece of ribbon or twine and create a loop for hanging it. Using glue, attach it at the backside of construction paper.
Voila! Your Bunny Hand is complete!! This Easter celebration craft is wonderful for all spring bulletin boards.
You can also involve the entire class in this.
Every student should make his or her own bunny hand and decorate it as they please; a fun way to celebrate Easter or spring in the classroom.
Therefore, grab your basket and head to Dollar Tree for supplies then prepare yourself for some bunny fun. This is an easy and adorable craft that will help kids get creative and enjoy the season.
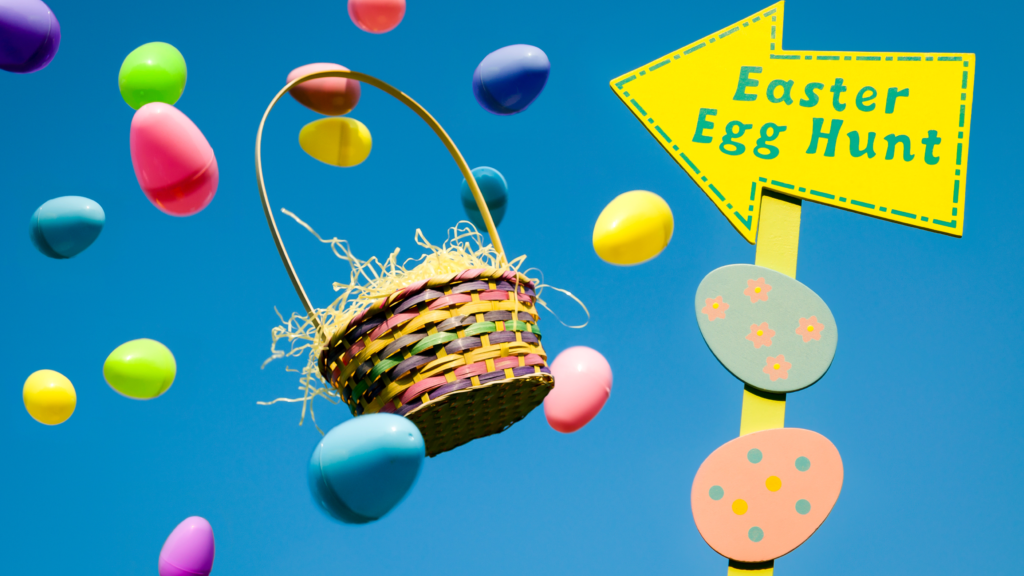
25. Egg Hunt Arrow
This amusing and imaginative undertaking is an amazing approach to convey a component of caprice into your Easter designs.
Dollar Store Delight: Save money and have fun crafting with supplies from Dollar Tree.
Easy Does It: This craft is simple enough for crafters of all ages and experience levels to do.
Functional Fun: That arrow does not only look cute but also directs keen egg hunters towards many hidden eggs!
Here’s what you’ll need to get started (you might already have some of this stuff at home!):
- Wooden Arrow Cutout (unfinished or already painted)
- Acrylic Craft Paint in Spring Colors (optional, if your arrow isn’t pre-painted)
- Paint Brushes (optional)
- Easter Egg Garland or Decorative Easter Ribbon
- Craft Glue or Hot Glue Gun and Hot Glue Sticks
- Markers, Stickers, or Stencils (optional, for adding messages or designs)
- Twine or Yarn (for hanging)
Let’s Craft Your Egg-cellent Arrow!
Painting Party (Optional): If your wooden arrow cutout isn’t already painted, it’s time to get creative! Paint it a bright spring color or use stencils or paint splatters to make a fun design.
Getting Fancy: Here comes the fun part! Cut a piece of Easter egg garland or decorative Easter ribbon to the length you want for the tail of your arrow. Do not forget to attach the garland or ribbon using craft glue or hot glue gun to the back of the arrow at an angle making it appear as if it is a tail in flight.
Message Time (Optional): If you want to put a fun message on your arrow, use markers, stencils or stickers to write something like “Egg Hunt This Way!” or “Hop to the Eggs!” on the front of the arrow.
The Finishing Touches: Cut a piece of twine or yarn and make a loop for hanging. Use glue to secure this at top of the arrow.
Voila! Your cute and useful DIY Egg Hunt Arrow is ready! Let him hang with pride either on your lawn or near the starting point of egg hunt so that all little rabbits (and birds) can easily follow directions directly towards their eggs’ locations.
Bonus Tip: Get everybody involved in decorating your arrow! Allow each person participate in giving out ideas and let it be one fun Easter craft project for everyone to enjoy.
So gather up some goodies, get your basket from Dollar Tree, and prepare yourself for a day full of crafting with family while enjoying Easter.
This post may contain affiliate links which means I may receive a commission for purchases made through links. I will only recommend products that I have personally used! Learn more on my Private Policy page.

